
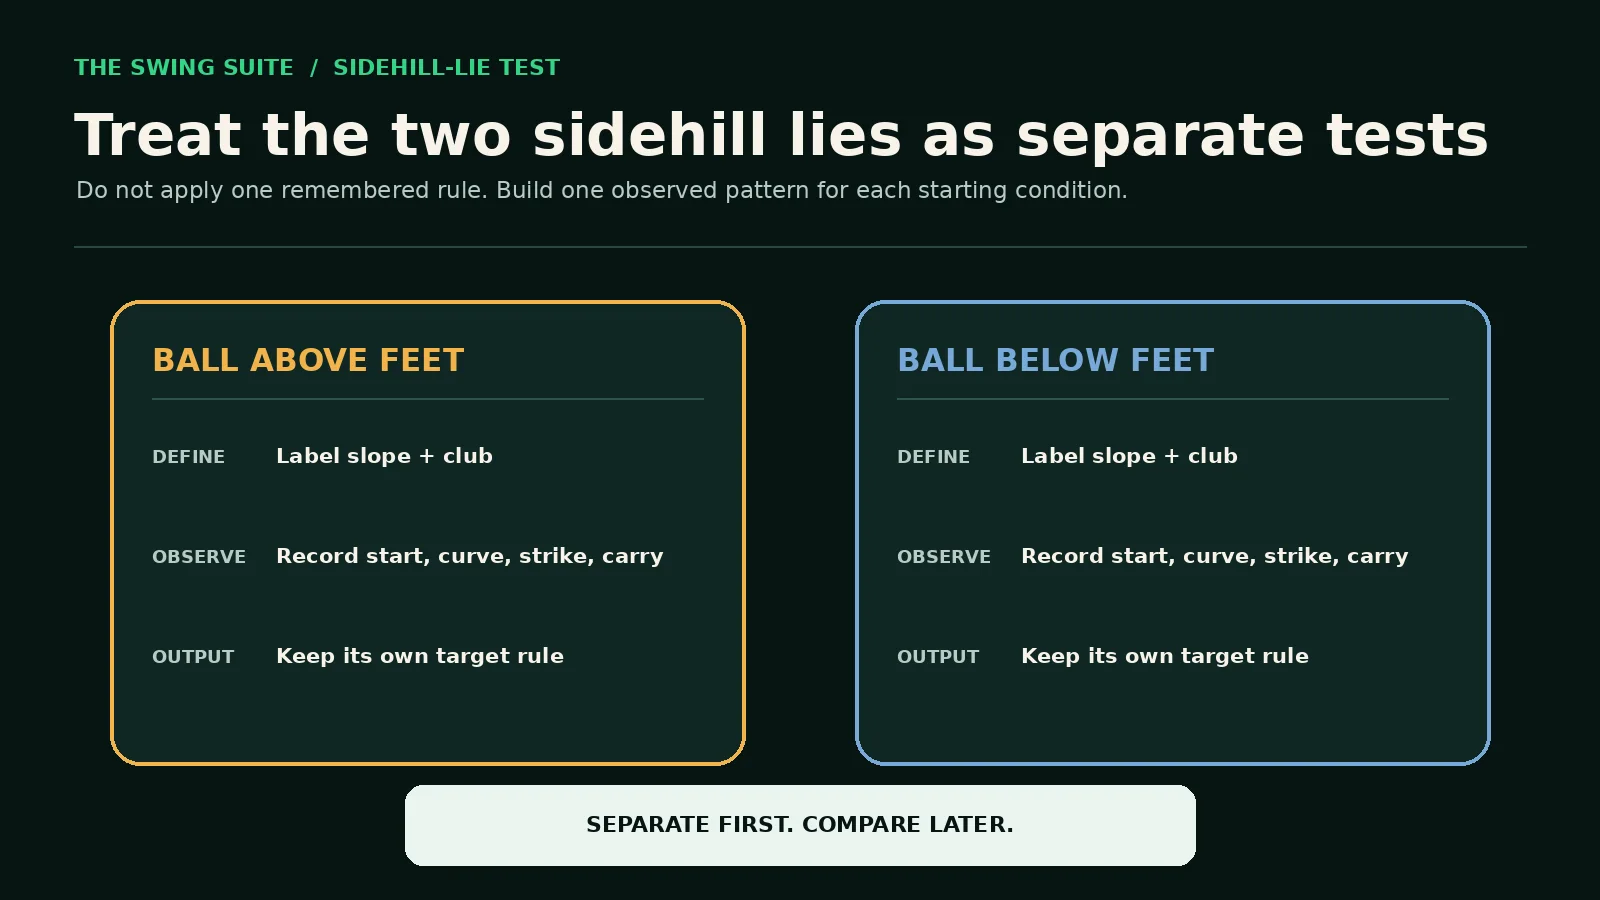
A sidehill lie should not be managed by memorising one arrow and aiming the opposite way. Test ball-above-feet and ball-below-feet lies separately. For each condition, record where the ball starts, how it curves, where contact occurs and how far it carries. Then build a cautious target rule from your own repeated pattern, not from a universal claim about what every slope must do.
The practical outcome is a two-part note: one observed pattern for the ball above your feet and another for the ball below your feet. Each note should include the club, approximate slope, lie quality, start-line tendency, curve, strike and carry. If the pattern is wide or contact is unstable, the correct decision may be more margin, less club, a shorter swing or a different route rather than a more ambitious aim correction.
All shot positions, directions and yardages in this guide are hypothetical. Slope severity, stance, club length, loft, ball position, speed, face delivery, lie and individual movement can change the result. The method is designed to reveal that result without pretending one player’s pattern is a law for everybody else.
The direct answer: run two labelled start-line and contact tests
Choose one club and a visible target. Create or find a safe, repeatable ball-above-feet condition and hit a small baseline set without changing the target after every ball. Record launch direction or observed start line, curve, strike location or strike quality, carry and finish. Then repeat the process for a ball-below-feet condition as a completely separate set.
Review the whole group. Look for where most shots start, whether curve adds to or cancels that start, where contact changes and whether carry remains usable. Write a provisional course rule that protects the costly side. Retest the same task before treating the rule as established. One dramatic shot is an observation, not a reliable pattern.
Keep the test lawful and safe. On the course, play the ball as it lies and do not improve conditions affecting the stroke in a way the Rules prohibit. In practice, use a designated area, mat or coaching setup where repeated sloping lies can be created without damaging the course or putting anyone at risk.
Why one remembered sidehill rule is not enough
Traditional advice often compresses a sidehill shot into a single prediction. That can be a useful starting hypothesis, but it is a weak final decision because the ball flight is produced by the golfer, club and lie together. A slope can alter posture and balance. The player may then alter handle height, ball position, swing direction, face delivery, speed or contact without intending to. Those responses can reinforce the expected pattern, reduce it or create a different miss.
The same player may also respond differently with a short iron and a fairway wood. Club length changes how the player reaches the ball. Loft changes the relationship between face orientation and ball flight. A severe slope can create a different movement problem from a gentle one. A ball sitting cleanly can produce a different strike from a ball resting down in grass on the same gradient.
That is why the useful question is not “Which way does a sidehill lie go?” It is “What does this player’s stock attempt do from this labelled lie with this club?” The first question invites a universal answer. The second creates a testable decision that can be updated as the lie, club or player changes.
Define the lie before you hit
Start by naming the condition accurately. “Sidehill” is too broad. Record whether the ball is above or below the feet, the approximate severity, the grass and the way the ball is sitting. If the stance is also uphill or downhill, note that separately. A compound lie should not be treated as a clean sidehill benchmark because another slope component is already changing the task.
Use simple repeatable labels such as gentle, moderate and severe if you cannot measure the gradient. The exact degree is less important than applying the same label consistently. Photographing the setup for private practice notes can help, provided the image is taken safely and does not interrupt play. The purpose is to know what the result represents when you read it later.
Name the club and intended shot as well. A stock 7-iron to a centre target is one task. A shortened 7-iron, a punch or a high recovery is another. Mixing them into one group widens the pattern without explaining why. Begin with a stock intention, then test alternatives under separate labels if they are useful on the course.
Choose a target that reveals start line
A vague area is not enough. Choose a narrow visual start reference inside a wider safe landing area. The start reference helps you see where the ball begins. The wider area keeps the test safe and prevents a learning exercise from becoming a demand for perfect accuracy. Outdoors, a distant tree trunk, range marker or alignment station can supply the line. Indoors, use the simulator target line.
Do not move the target to follow each result during the baseline. If one ball starts left, then the next target is moved right, the set no longer describes one intention. Keep the original target long enough to reveal the current pattern. Target adjustments belong after the group has been reviewed, not as an emotional response to every shot.
TrackMan defines launch direction as the horizontal angle of the ball’s centre of gravity immediately after separation from the clubface, relative to the target line. That makes it a useful measured version of start line when available. Without a launch monitor, record a simple left, near-line or right observation from a safe viewing position.
Review TrackMan’s launch-direction explanation ↗
Record curve separately from start line
A ball can start on one side and curve towards the centre, start near the line and curve away, or start and continue on the same side. Those are different patterns even when the final position is similar. Record start first, then curve. Final finish alone cannot show which part of the flight created the miss.
Use restrained labels: started left, near line or right; curved left, stayed similar or curved right. If a launch monitor supplies spin-axis or other ball-flight information, keep the measured value, but do not let extra precision obscure the course question. The practical concern is whether the complete flight occupies the intended corridor and which boundary needs protection.
Compare the combination after the set. A consistent start with variable curve suggests a different decision problem from a variable start with little curve. A group that crosses the target line can require room on both sides. The target rule should reflect the widest recurring useful pattern, not only the average finish.
Record contact before explaining the direction
Sidehill lies often change contact because the player must organise posture and balance around a ball that is not level with the feet. Record the strike immediately after each shot. A simple label such as centred, heel, toe, heavy, thin or uncertain is enough to stop unlike outcomes being blended. Face-impact spray or another permitted practice aid can improve the record when used in an appropriate practice setting.
Do not diagnose a full swing fault from one strike label. Contact is evidence about the shot, not a complete explanation by itself. A heel strike and left start may occur together in one set, but that does not prove the strike caused every directional outcome. Look for repeated relationships, then test one change at a time.
Carry belongs beside contact. A shot that starts safely but loses substantial carry may still fail the course problem. A shot that carries its normal number but finishes outside the corridor may be equally unusable. The useful sidehill pattern has depth and width, with contact notes explaining why some points may be less repeatable.
Use club path and face-to-path as context
TrackMan describes club path as the horizontal direction of the clubhead’s centre at impact. Face-to-path is the difference between face angle and club path. Those measurements can help explain why a start-and-curve pattern changed, but the test should not begin by forcing a preferred path number on an unstable slope.
Review TrackMan’s club-path explanation ↗
Review TrackMan’s face-to-path explanation ↗
Start with the ball flight and strike. If the ball-above-feet group repeatedly starts on one side, inspect whether face angle, club path or both move with it. If the ball-below-feet group contains two start directions, look for changes in balance, contact and delivery between those shots. The data should narrow the next question rather than produce a technical verdict from one number.
Avoid turning a measured tendency into a prescription for every golfer. A path value has meaning relative to the intended shot, face delivery, strike and target. The same number can accompany different ball flights when other inputs change. Use the measurement to compare matched attempts by the same player, then judge the complete outcome.
Build the ball-above-feet baseline
Set up a repeatable ball-above-feet lie in a safe practice environment. Choose one club and centre target. Take enough rehearsal swings to feel stable without rehearsing until fatigue changes the task. Then hit a small recorded set with the same intention. Do not begin with an aim correction based on what you expect. The baseline is meant to show the uncorrected pattern.
After every ball, record start, curve, strike and carry. Add a balance note only when it clearly changed the swing, such as falling towards the toes or standing up abruptly. Keep ordinary poor shots. Remove only genuine measurement failures, interruptions or balls struck under a different condition, and record why they were excluded.
Review the points together. The group may cluster to one side, remain near the line, cross the line or split into more than one pattern. Contact may show a repeated face location. Carry may be stable or may vary with strike. Write what happened without upgrading it into a permanent rule: “Moderate above-feet 7-iron, six-ball baseline, most starts left of line, mixed curve, toe contact common” is useful and honest.
Build the ball-below-feet baseline
Reset the task rather than treating the second lie as the opposite answer. Use the same club and target where safe, but label the new slope independently. Rehearse enough to establish balance, then record a new set. The goal is not to prove symmetry. It is to discover whether the player’s below-feet pattern is narrow, wide, one-sided or inconsistent.
Keep the same observation order: start, curve, strike, carry. A consistent routine reduces hindsight. If the shot finishes right, do not automatically write “the slope made it go right”. First record what was visible. Later, compare face, path, contact and balance if data is available. Description should come before explanation.
If the player cannot establish a safe stance or make a controlled swing, stop the test. That is already useful information. On the course, the decision may be a shorter club, smaller motion or recovery target. A test does not need a full-speed shot to be successful; it needs to reveal which option can be delivered without losing balance or contact.
Plot the pattern in two dimensions
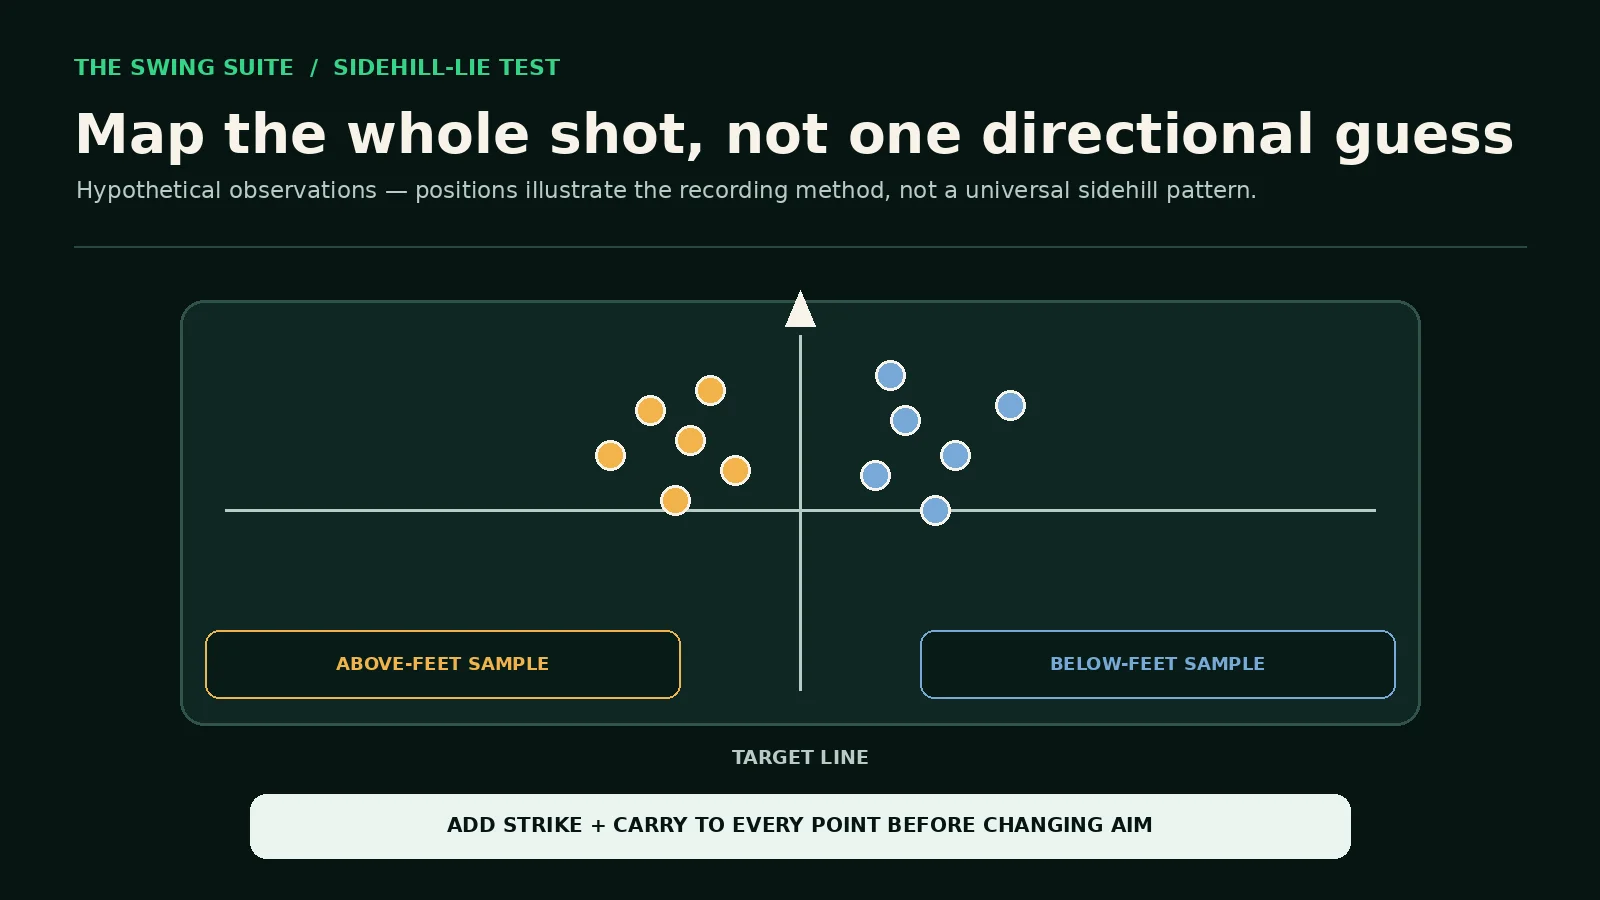
Draw a target line with depth marks. Plot each shot by its lateral position and carry. Use one colour or symbol for ball above the feet and another for ball below the feet, but keep the sets identifiable. Add a short strike code beside each point. A two-dimensional plot prevents a tidy average from hiding a wide or short pattern.
The diagram in this guide is hypothetical. It deliberately places sample points on different sides to demonstrate the method, not to claim that every above-feet shot starts left or every below-feet shot starts right. Your plot may show that expected shape, the reverse, a centred cluster or no stable group. The observed result is the one that matters.
Look for the useful cluster and the costly miss. The useful cluster describes shots that have representative contact and occupy playable ground. The costly miss identifies the boundary that demands margin. Do not delete the miss to make the cluster attractive. Keep its frequency visible and decide whether the course target can absorb it.
Separate slope effect from player response
A slope changes the geometry of the setup, but the player also responds. They may stand taller, sit lower, grip down, move nearer or farther from the ball, shorten the swing or change speed. Those responses are not automatically mistakes. Some may be useful adaptations. The test should identify which response produces balance, centred contact and a manageable flight.
Change one variable after the baseline. For example, compare the normal grip with a clearly labelled gripped-down version, or compare a full intention with a three-quarter intention. Keep the lie, target, ball and club stable. If several changes are made together, a better shot cannot show which adjustment mattered and a worse shot cannot show which one failed.
Retest the original task after the practice block. A drill can create a temporary feeling that works only while attention is on the drill. The matched retest asks whether the stock course-use attempt improved. Preserve both outcomes, including an unsuccessful retest. The record should support future decisions, not advertise a success that the complete set did not show.
Build a target rule from the observed group
Once the baseline and retest are visible, write a cautious rule for that exact label. State the club, lie, common start, curve, contact and carry. Then identify the safe target margin. If most shots start left and remain left, the target may need room on that side. If starts vary both ways, a one-sided aim correction may simply move one miss closer to danger.
Aim changes should be smaller than the confidence in the evidence. A tiny set from one slope does not justify a precise permanent adjustment. Use a provisional note and repeat the test on another day. If the pattern remains similar, the rule becomes more credible. If it changes, look for slope severity, club, lie, fatigue or setup differences before averaging unlike tasks.
The course rule should always include an escape clause: if the landing area cannot contain the observed width, change the shot. Choose a shorter club, a wider route, a controlled swing or a recovery position. Strategy is not the art of making every difficult shot fit. It is the ability to recognise when the pattern does not fit.
Protect the start-line side before chasing curve
Start direction matters immediately because a nearby tree, bunker lip or penalty-area edge can remove the ball before its later curve becomes useful. When the first part of the flight has a clear boundary, protect it first. A ball that might curve back is not safe if it starts through an obstacle or outside the available window.
Then protect the curve side and final position. A shot may start inside the corridor but continue moving towards trouble. The complete target should allow for both. If the pattern regularly crosses the target line, centre aim may need room on each side rather than a large move towards one boundary.
This is also why a visual start reference is useful in practice. It separates the early direction from the final result. A player can then decide whether an aim change addresses the observed start or merely compensates for a curve that may not repeat. Better decisions come from knowing which part of the flight is stable.
Account for carry loss without inventing a fixed deduction
Uneven lies can change strike and speed, so carry may differ from a level-lie stock number. Do not apply one universal percentage or club adjustment. Record the actual carry pattern for the labelled slope and club. If the set is short because contact is poor, more club may increase difficulty rather than solve it. The safer answer may be a smaller target and a simpler motion.
Compare short, typical and long observations rather than only the average. A forced carry should be tested against the short side. Back trouble should be tested against the long side and expected release. If the window overlaps both boundaries, the shot has no comfortable depth even when the centre number looks ideal.
Wind, temperature, grass and ball position can further change carry. Label them when material. Do not combine a calm indoor slope station with a windy outdoor bank and call the result one average. Matched evidence is more useful than a larger but mixed sample.
Choose the club for balance as well as distance
Longer clubs can make a sidehill setup harder to organise because the player must manage reach, posture and low point on uneven ground. That does not mean a particular club is always wrong. It means the club should earn its place by producing a manageable strike and flight under the actual condition.
Test a shorter club when the baseline is unstable. The shorter option may carry less but produce a much narrower start and contact pattern. On the course, a reliable advance to a wide area can be more valuable than attempting the maximum distance with a pattern that reaches hazards on both sides.
Loft and lie interaction also affect how the club presents at impact, but equipment theory should not replace the player’s test. Use the measured or observed flight to decide. If a fitting or coaching question emerges, reproduce the lie safely and compare clubs under matched conditions rather than judging them from one best shot.
Use a smaller swing when speed widens the pattern
A full-speed attempt can make balance harder on a slope. Test a clearly labelled three-quarter or controlled version after the stock baseline. Keep the target and observation method the same. The controlled shot is useful only if its start, contact and carry become more predictable enough to improve the course decision.
Do not assume shorter always means safer. Some players decelerate, lose their sequence or strike worse when trying to guide the ball. That is why it is a test rather than a command. Compare complete groups. If the controlled version is better, store it as a separate sidehill option with its own carry. If it is worse, preserve that evidence and choose another solution.
The best course option may be a normal committed motion with a more conservative club and target. “Swing easy” is not a strategy unless the player has a rehearsed version whose outcome is known. Every adaptation should have a label, a pattern and a carry reference.
A 50-minute sidehill-lie practice session
Minutes 0–8: warm up on level ground
Begin with movement and ordinary level lies. Establish a target, strike and rhythm before adding slope. The warm-up should not become a technical rebuild. Its job is to make the later comparison less dependent on the first swings of the day.
Minutes 8–15: define the two stations
Create safe above-feet and below-feet stations in an approved practice area. Label slope severity, grass or mat, club and target. Confirm that every swing has space and that balls cannot endanger other players. If the stations cannot be made repeatable, use the session for observation rather than pretending it is a controlled test.
Minutes 15–25: first baseline
Hit the above-feet set. Record start, curve, strike and carry after every ball. Keep the target fixed and ordinary misses visible. Finish by writing one sentence that describes the group without explaining it.
Minutes 25–35: second baseline
Move to the below-feet station and repeat the same process. Do not use the first set as a prediction. Give the second lie its own notes and summary. Stop if balance or safety deteriorates.
Minutes 35–43: test one adaptation
Choose one response supported by the baseline: grip length, club, swing size, setup distance or target process. Change only that variable within one lie. Record the result using the same fields. The aim is to learn whether the adaptation improves the complete pattern, not whether it creates one attractive shot.
Minutes 43–48: matched retest
Repeat the original baseline task for the lie you practised. Compare start width, curve, strike, carry and costly misses. Do not change the scoring rule after seeing the result. A weaker retest is still useful because it prevents an unstable change becoming a confident course plan.
Minutes 48–50: write two course notes
Finish with one above-feet note and one below-feet note. Include the club and slope label. Mark each note provisional unless repeated evidence supports it. Add the safer alternative for a lie that exceeds the tested severity or a target that cannot contain the pattern.
Common sidehill patterns and what to test next
The group starts consistently to one side
Confirm whether curve remains on that side or returns towards the line. Check strike and carry. A consistent start can support a cautious target adjustment, but preserve enough margin for the widest recurring result. Retest before turning it into a permanent rule.
Start direction changes but contact is consistent
Inspect face and path data if available, and review balance and target commitment. The issue may be delivery variability rather than reach. Avoid changing equipment or aim until you know whether the start pattern can be narrowed with one clear intention.
Contact moves towards one part of the face
Test setup distance, posture or grip length one at a time. Keep the ball flight in view. Moving contact towards the centre is valuable only if balance, start and carry also remain useful. One centred strike does not erase the baseline frequency.
Carry varies more than direction
The main course risk may be depth rather than side. Compare short carries with front trouble and long carries with back trouble. Test a shorter club or controlled motion if strike drives the range. Do not solve a depth problem with a large one-sided aim change.
The pattern is wide on both sides
Increase the target margin or change the shot. Aiming farther left or right cannot make a two-sided pattern narrow. Practise balance and contact in a safe setting, then retest. On the course, choose the largest available landing area.
The expected textbook direction does not appear
Keep the observation. Check that the lie and target were labelled correctly, then repeat the test. Individual movement and delivery can produce a different result. The purpose of testing is to discover the player’s pattern, not to force the data to match a saying.
Common mistakes in sidehill-lie practice
- Treating ball-above-feet and ball-below-feet shots as one combined category.
- Changing aim after every ball instead of completing a fixed-target baseline.
- Recording only final finish and losing the difference between start and curve.
- Deleting ordinary poor strikes because they make the pattern look wide.
- Assuming a directional rule applies equally to every club and slope.
- Mixing gentle, severe and compound lies without labels.
- Changing grip, posture, club and swing size at the same time.
- Ignoring carry loss while concentrating on left-right direction.
- Using an unsafe stance or full-speed motion to complete the test.
- Declaring one good retest a permanent course solution.
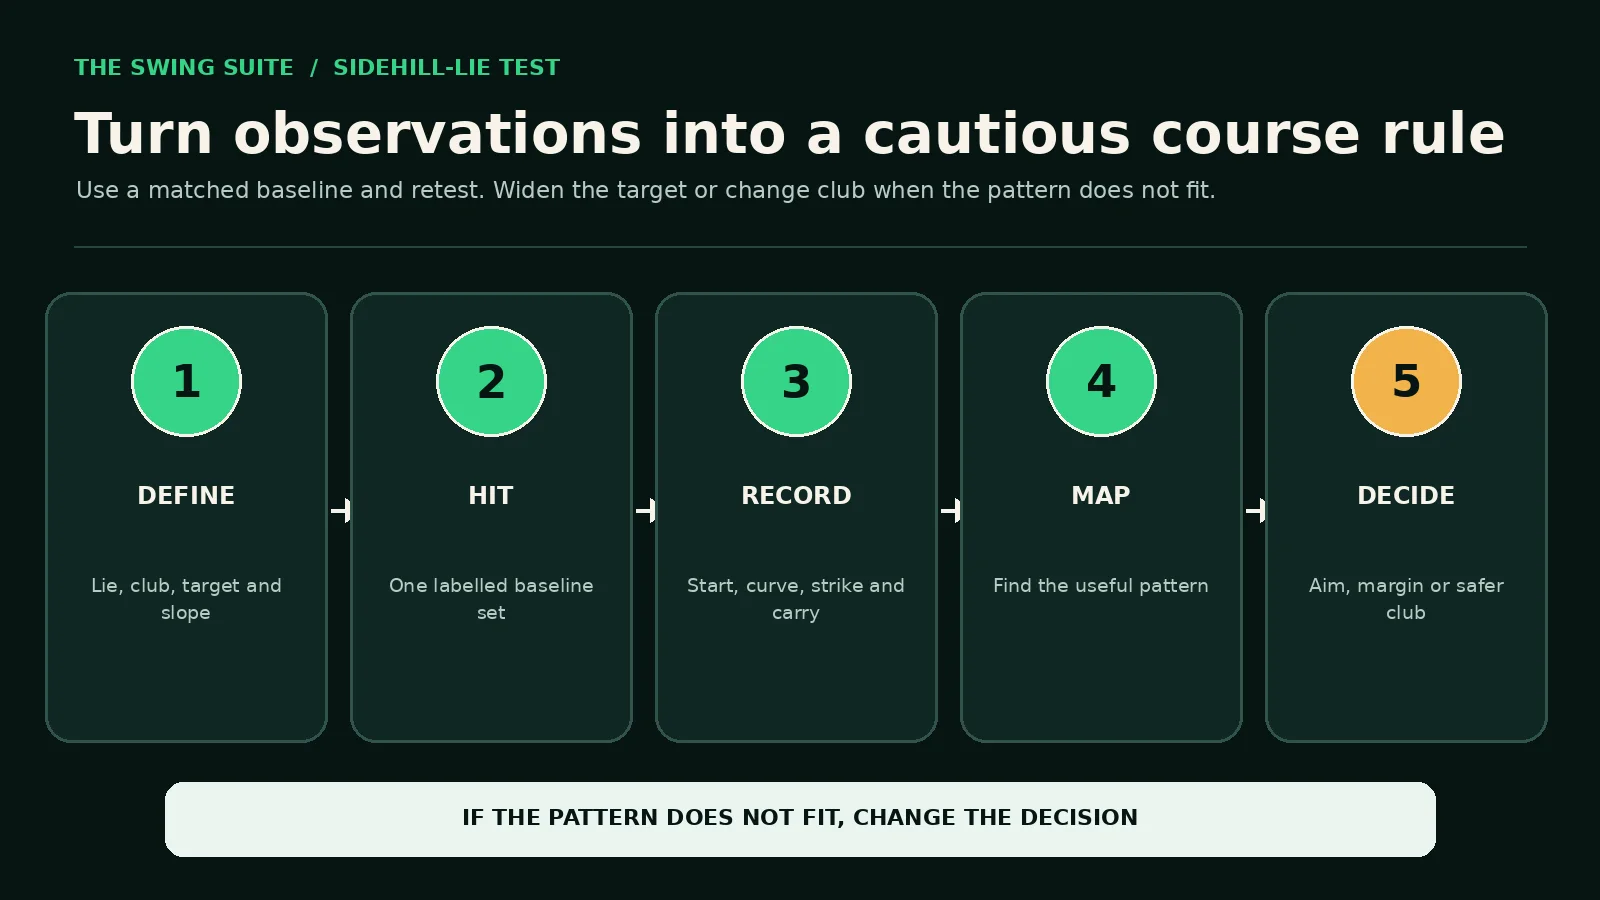
The correction is a disciplined sequence: define, hit, record, map, change one variable and retest. That sequence keeps the decision attached to evidence. It also makes a coaching session more useful because the player can bring a clear pattern rather than a vague report that uneven lies feel difficult.
Questions golfers often ask
Which way should I aim with the ball above my feet?
Begin with your tested pattern rather than a universal amount. If your matched sets show a consistent start and curve, give the recurring miss room. If the group is two-sided or contact is unstable, use a wider target, safer club or smaller shot instead of relying on a precise aim correction.
Which way should I aim with the ball below my feet?
Use the same process independently. Record start, curve, strike and carry from a labelled below-feet lie. Do not assume it must be the exact opposite of the above-feet result. Build margin from the observed group and retest it.
How many shots do I need?
Use enough attentive shots to reveal more than one outcome, then repeat the set on another day. A small set is provisional. More shots are not automatically better if fatigue, changing slopes or several swing intentions make them incomparable. Consistent labels and matched retests matter more than one large mixed bucket.
Should I grip down?
It is a useful adaptation to test, not an automatic answer. Compare a labelled gripped-down set with the original task. Record whether balance, contact, start and carry improve together. Store the changed carry separately if the adaptation becomes a course option.
Should I take more club?
Only if the added club still produces a playable pattern. If contact is unstable, a longer club may widen the miss. Compare the short-side carry, width and strike of the alternatives. Sometimes less distance with better control is the stronger result.
Can I practise sidehill lies indoors?
Yes, if the facility has an approved stable slope station or coaching aid and enough safe space. Label the surface and severity. Do not improvise an unstable platform. Compare indoor learning with outdoor lies before treating the carry and turf interaction as identical.
What if the lie is also uphill or downhill?
Label it as a compound lie and avoid applying the clean sidehill note without adjustment. The additional slope changes the task. Choose more margin, a simpler shot or a separate test if that combination appears often enough to justify one.
A simple sidehill-lie checklist
- Name whether the ball is above or below the feet.
- Label slope severity, grass, ball position, club and target.
- Keep above-feet and below-feet sets separate.
- Hold the target fixed during the baseline.
- Record start line before curve and final finish.
- Add strike and carry to every valid shot.
- Keep ordinary misses and note genuine exclusions.
- Plot depth and side rather than relying on one average.
- Change one adaptation at a time.
- Retest the original task before changing the course rule.
- Choose a safer club or route when the pattern does not fit.
This checklist turns an awkward lie into a decision process. It does not promise that the slope becomes easy. It gives the player a way to separate what was expected from what actually happened, protect the costly boundary and choose a shot whose pattern belongs inside the available space.
Keep the final note short enough to use. A practical entry might read: “Moderate ball-above-feet lie, 7-iron, most starts left of the centre reference, carry slightly shorter when contact moves towards the toe; aim only when the landing area has room, otherwise use the wider recovery route.” That is more useful than a precise correction copied from a different player because it identifies the condition, evidence and alternative.
Review the note when the task changes. A new club, a different swing pattern or repeated on-course evidence may make an old rule stale. Preserve the earlier record rather than silently editing it, then add a dated matched test. The history can show whether the pattern is stable, whether one adaptation keeps working and when a safer decision should replace a confident aim adjustment.
Use the Rules and protect the course
Rule 8 is built around playing the course as it is found and limits actions that improve conditions affecting the stroke. Do not press down grass, build a stance or alter the lie merely to recreate a preferred setup during a round. If relief is available under another Rule, apply that Rule correctly; otherwise the uneven condition is part of the shot.
Review Rule 8: Course Played as It Is Found ↗
Practice should also respect the facility. Use designated slope areas, mats or coaching aids. Avoid repeated shots from a bank that damages turf or sends balls towards people, roads or neighbouring holes. A controlled station is valuable only when it is lawful, stable and safe.
When a suitable slope is unavailable, rehearse the observation system on level ground: start, curve, strike and carry. Then apply the same record when a safe sidehill practice opportunity appears. The discipline of recording can be trained even when the exact lie cannot.
Turn the test into one coaching priority
If the two sidehill sets show unstable balance, repeated heel or toe contact, a start-line pattern that reaches trouble or a carry window that makes club selection uncertain, a structured lesson can reduce the problem to one practical priority. The objective may be a more stable setup, a rehearsed controlled motion, a better target process or a clearer decision to avoid the shot.
Bring the notes rather than only the conclusion. Record the club, lie label, start, curve, strike, carry and any adaptation tested. That allows the lesson to reproduce the problem, compare matched attempts and finish with a course rule that is specific enough to use without pretending it applies to every slope.
See the related guide to start direction and curve ↗
Current Swing Suite lesson options, venues and availability remain on the live booking page rather than being hard-coded here. The goal is to leave with two honest patterns, one matched retest and a safer decision for the lie in front of you.