
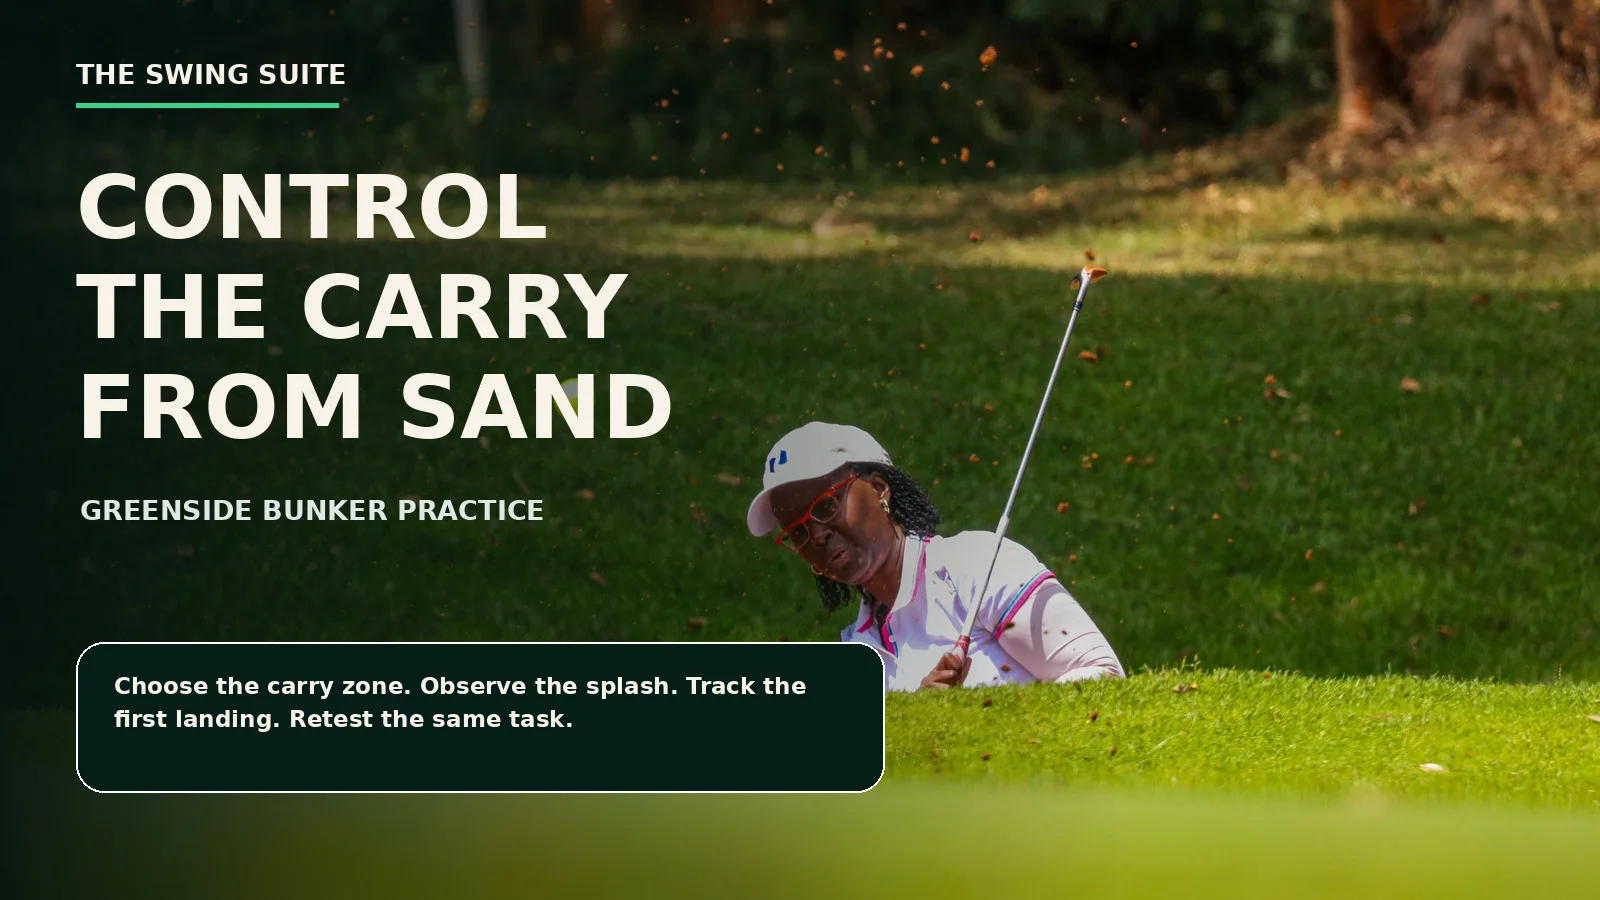
Greenside bunker distance control improves when the practice task separates what happened in the sand from what happened after the ball left it. Choose three safe carry zones on the green, call one before every shot and use the same stock bunker action for a short baseline. Record a simple sand observation, the first landing and the rollout as different fields.
The sand observation is not a promise of exact low-point measurement. It is a practical note about the visible entry or splash pattern relative to a pre-marked practice window. The landing score answers whether the ball reached the called carry zone. The rollout describes what the surface did afterwards. Keeping those observations apart stops one close finish from hiding an unreliable strike or carry.
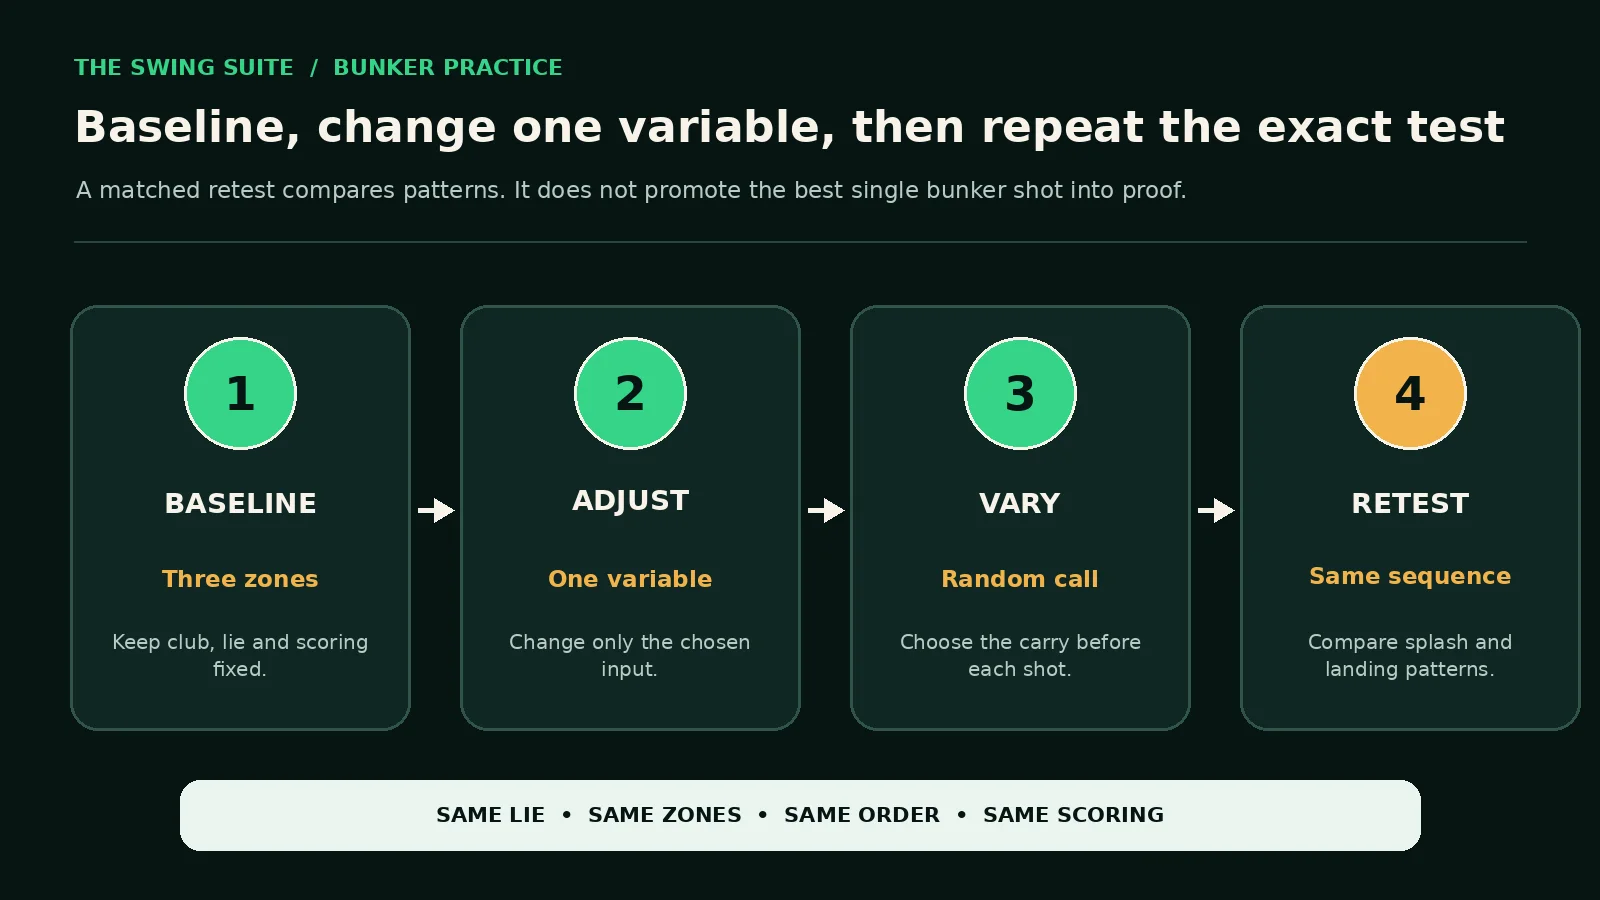
After the baseline, change only one controllable input. That might be the length of motion, the speed of the motion, the club or the intended splash window, depending on the pattern and the player. Repeat the original calls as a matched retest. Judge the group, not the best ball, and preserve every sample distance as illustrative rather than universal.
The direct answer: score the bunker shot in stages
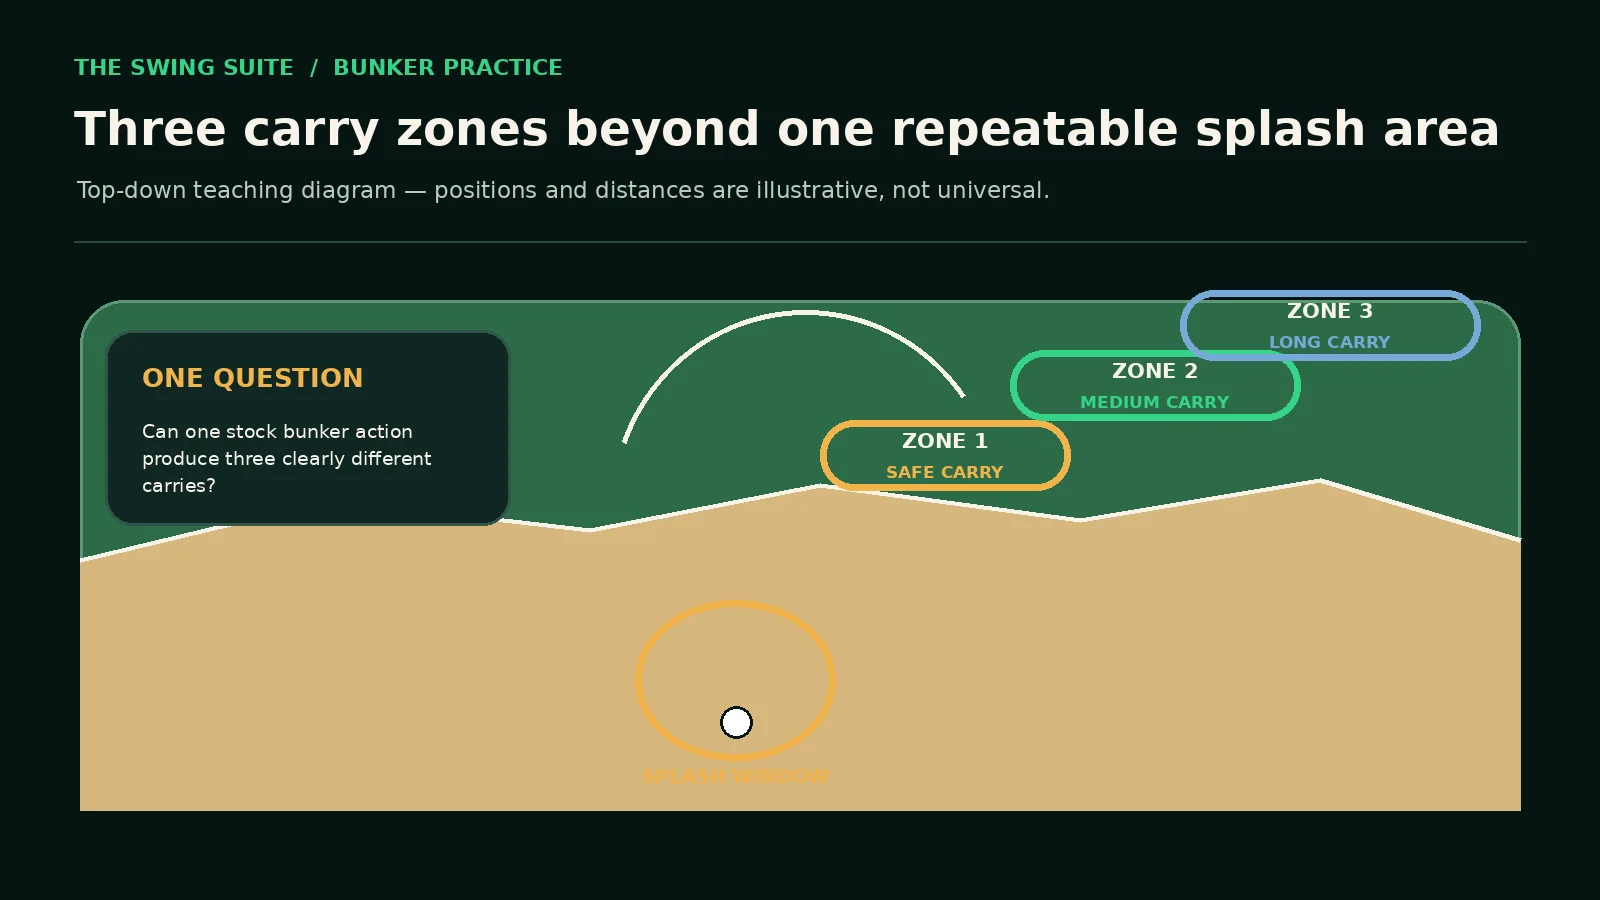
Mark three landing zones beyond the bunker lip, each representing a clearly different carry. Choose one safe, representative lie and a stock shot that can clear the face without forcing an extreme technique. Before each ball, call the zone. After the strike, note whether the visible splash or entry was broadly on the intended window, then score the first landing as short, in-zone or long.
Only after those two notes should you record rollout and finish. A ball can leave the sand from the intended area, land in the called zone and still release farther than expected. Another can be struck inconsistently, land short and finish close after a fortunate bounce. The full result matters, but it should not erase the earlier evidence.
Use three or four balls per zone for the baseline, enough to see an early pattern without pretending the set is statistically conclusive. Make one focused change, practise briefly and repeat the same zone order. The useful question is whether the splash and landing patterns became clearer under the matched task, not whether the last ball stopped nearest the hole.
Why bunker distance control needs its own test
A normal pitch begins from grass or a mat, where the ball and club interaction can be observed more directly. A standard greenside bunker shot is a different task because the player is managing sand, lip clearance, carry and release together. Copying a grass pitching test without recording the sand observation removes an important part of the shot.
The bunker also changes the visual decision. The player may see only the top of the flag, a steep face or a narrow landing shelf. The first safe carry can matter more than the final pin distance. A useful practice design therefore begins with the minimum safe flight over the lip, then builds medium and longer carry zones without encouraging reckless targets.
This article is a calibration framework, not one universal bunker method. Sand depth, firmness, moisture, slope, lie, bunker face, ball and player all change the task. Keep the first session simple enough that one pattern can be observed, then label any changed condition before comparing results.
Compare the companion three-zone pitch-distance test ↗
Understand the three observations
The sand observation
The sand observation describes what you can see around the strike: for example, broadly on the intended window, noticeably early or deep, or noticeably late or thin. Use plain language and avoid claiming an exact entry distance from an unaided view. If the pattern cannot be seen reliably, widen the category or use safe video from the side under the venue’s rules.
Do not draw a line in a bunker or deliberately test the sand during a round. This is a practice design for a permitted practice area, where markers and observation are allowed by the facility. The Rules of Golf include specific restrictions on touching sand before a stroke in a bunker, so keep on-course decisions within the current rules rather than importing a practice setup into play.
Read the R&A Rule 12 bunker guidance ↗
The first landing
The first landing is the primary distance-control score. Watch or measure where the ball first contacts the green relative to the called zone. Mark short, in-zone or long immediately. If the exact first bounce is hidden by the bunker face, ask a safely positioned observer or use a suitable measured practice environment; do not invent precision from a poor viewing angle.
TrackMan defines carry as the distance from the starting position to where the ball lands. That definition supports the central distinction in this drill: the landing can be assessed separately from the distance after landing. A launch monitor can provide measured carry when the setup supports the shot, while an outdoor zone gives a practical visual version of the same question.
Review TrackMan’s definition of carry ↗
Rollout and finish
Rollout begins after the first contact with the green. Record short, medium or long relative to the planned shot, then note the final result. The surface, slope, grass, moisture, ball, spin, strike and landing angle can all influence the reaction. A basic scorecard should report the behaviour without assigning one cause from a single shot.
The finish combines the carry and rollout. It is the course result, but it is not a clean diagnostic by itself. A ball that lands on a downslope can travel well beyond an otherwise useful carry. A ball that lands short can stop close after catching a soft patch. Keep the finish, but do not allow it to rewrite the first landing.
Choose three zones that are safe and meaningfully different
Begin with the bunker lip and available green. Zone one should be a safe carry beyond the lip, not a target placed so close that a small error returns to the sand. Zone two should require a recognisably different carry while remaining comfortable. Zone three should test the longer version without demanding an entirely different specialty shot.
For an illustrative practice area, the zones might be centred around short, medium and long landing bands rather than exact yardages. If measured numbers help, a player could use three carries suited to their own bunker and skill level. The numbers must come from the actual safe space; they are not standards and should never be copied when the lip, green or surroundings make them unsuitable.
Make the bands generous at first. A narrow towel can turn ordinary observation error into a false miss. Use a strip several paces deep, a painted range target or existing green features that are easy to see. Narrow the zone only after the player can create distinct carry patterns without steering or abandoning the normal motion.
Keep the first three zones on one general target line if possible. This reduces direction as a competing variable and makes the carry contrast easier to read. Later sessions can move the zones left and right, add different slopes or change the flag. The baseline should answer one question before the practice adds another.
Build the practice area without creating a hazard
Use a designated practice bunker or a supervised lesson environment. Confirm that the intended flight, landing and possible rollout remain inside the safe practice area. Keep observers outside the swing arc, target corridor and ricochet path. Never ask someone to stand near the bunker lip merely to watch the first bounce.
Choose flat, low-profile markers only where the facility permits them. Keep loose equipment away from the likely strike and landing areas. If the practice bunker is shared, do not leave lines, towels or balls where another player may hit. Pause the drill when anyone enters the target area, even if the next shot is intended for a different zone.
Rake and care for the bunker according to the venue’s policy after the session. The spirit of the game includes consideration for the course and other players. A productive practice block should not leave deep footprints, scattered balls or damaged edges that make the next player’s task worse.
Review the R&A spirit of the game guidance ↗
Choose a repeatable lie before judging technique
A flat, representative lie gives the clearest starting point. Place or drop practice balls consistently only where the practice facility allows it. Avoid comparing one ball sitting cleanly on firm sand with another buried in a footprint and calling the difference a distance-control failure. Lie variation is useful later, after the stock task has a baseline.
Record the sand condition in simple terms: firm, medium or soft; dry or damp; level or sloping. These labels are observations, not laboratory measurements. They prevent a later session from being compared carelessly with a completely different surface. If conditions change during the session, start a new labelled block rather than merging the results.
Keep the ball type consistent. A change of practice ball, premium ball or wet ball can alter the shot and reaction. You do not need to model every effect; you need to stop an unlabelled equipment change from becoming a false technique conclusion. Use the same club as well unless club selection is the deliberate variable.
Set the baseline before offering a fix
Warm up enough to understand the sand and clear the lip, but do not rehearse every zone until the scored task becomes memorised. Confirm the club, lie, target line, three zones, sequence and score categories. State what counts as an invalid attempt, such as an interruption or a ball placed in a clearly different lie.
A practical baseline is nine balls: zone one, zone two and zone three, repeated three times. Nine is a manageable sample, not a scientific threshold. A beginner may use six. An experienced player may use twelve if attention and bunker condition remain consistent. Stop before fatigue or repeated raking changes the task materially.
Use a normal routine. Look at the called zone, choose the shot and commit. Record the sand observation and first landing before discussing technique. Continuous ball-by-ball correction can create a short-long cycle in which each swing is a reaction to the previous miss. Complete the set before selecting the first intervention.
Use a scorecard that protects the sequence
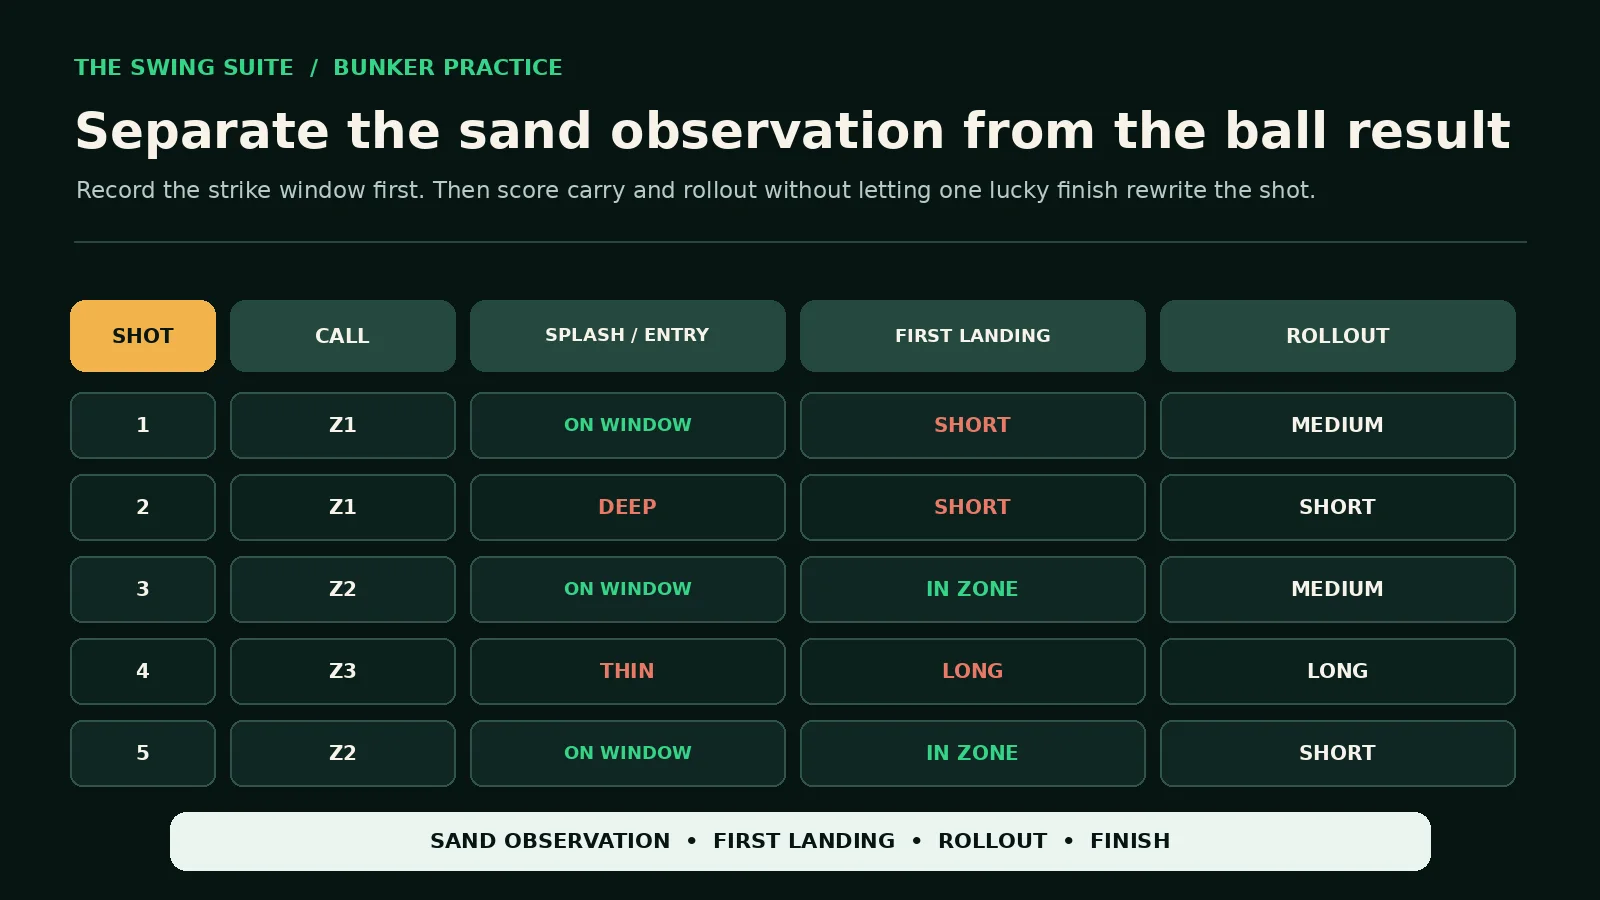
Create columns for shot number, called zone, sand observation, first landing, rollout and finish. Add lip clearance or contact quality only if it can be recorded consistently. Short codes are enough: on-window, early, late; short, in-zone, long; short, medium, long rollout. The scorecard should support the shot rather than dominate it.
Define the codes before the baseline. Decide how to score a ball that clips the lip, a ball whose first landing cannot be seen and a ball affected by another player. If the rule changes after a poor result, the data becomes a story written backwards. Honest unknowns are more useful than precise-looking guesses.
Preserve order. A sequence of early splashes followed by long landings may reveal an overcorrection that totals hide. Three good zone-one shots and three scattered zone-three shots point towards a different problem from one random miss in each band. Review the transitions as well as the count of successes.
Read the pattern before choosing the variable
The splash varies and the carry varies
When both observations spread, simplify the shot before chasing a yardage map. Return to the medium zone, use the most comfortable club and widen the splash category. Look for one representative motion and a stable finish. A three-zone test cannot produce useful distance evidence when the basic strike pattern changes completely from ball to ball.
Do not remove every poor shot from the record. The variability is the finding. Exclude only attempts that meet the invalid-shot rule established before the set. If six of nine balls show different sand and carry results, the next practice block should build a clearer stock action rather than create more precise targets.
The sand pattern is similar but every carry is short
This suggests the strike observation is reasonably stable while the chosen carry input is under the call. Confirm that the zones were measured from the ball and that the longest zone is realistic. Then test one change: a longer motion, a different club, a clearer speed intention or a modified target. Do not alter all four together.
Use a short discovery block at the medium zone. If the selected change adds carry without destroying the sand pattern, test it at the other zones. If the carry improves but the splash and contact become erratic, the change has traded one problem for another. Return to the simpler version and choose a smaller progression.
The first landings cluster but rollout changes
This is useful evidence. The carry task may already be working. Check whether the zones cross a slope, change grass density or receive the ball from different heights. Preserve the successful landing scores and map the release. The course decision may require a different landing area or trajectory rather than a rebuilt bunker action.
Do not claim the rollout changed because of one measured parameter unless the pattern supports it. TrackMan lists launch, spin and landing information among its ball-flight data, but one number should not become the whole explanation. Compare several matched shots and keep surface conditions visible in the interpretation.
Explore TrackMan’s official parameter overview ↗
Zone one works and zone three becomes chaotic
The player may have one comfortable stock shot and an uncalibrated longer version. Keep zone one intact. Spend the discovery block alternating zones two and three, with one clear distance input. Watch for a collection of changes—wider stance, faster transition, extra hand action and different ball position—that appear only when the target moves farther away.
If the long zone requires a visibly different shot, label it as a second technique rather than pretending it is the same stock action. That may be an appropriate course skill, but it deserves its own baseline. The purpose of this test is not to force every distance from one motion; it is to understand which shot is actually being used.
The pattern alternates short and long
Alternation often appears when the player corrects the previous ball rather than executing the current call. A short carry leads to a forced hit, the next ball flies long, and the player then slows down. Remove immediate technical commentary and hit a three-ball mini-set to one zone with one intention. Review the group only after all three.
If alternation remains, widen the landing zone and reduce the distance contrast. Check that each lie is genuinely similar. A two-sided pattern is rarely clarified by aiming at a smaller target or adding several swing thoughts. Stabilise the stock decision first, then rebuild the three-zone challenge.
Choose one distance-control input
There is no requirement to use one bunker distance system. Some players vary motion length with one club. Some keep a familiar motion and change club. Some change the planned splash window or trajectory. The useful system is one that the player can state clearly, execute safely and test under matched conditions.
Write the chosen input on the scorecard. For example: compact, medium and long motion with the same club; or the same motion with three club choices. This is a working map, not a universal formula. The test asks whether the mapping produces distinguishable carries today under the recorded lie and sand condition.
If trajectory becomes the variable, create a separate block. A lower running bunker shot and a higher softer shot may need different targets, clubs and setup. Combining them without labels makes the data unreadable. First calibrate the stock shot, then compare a genuinely different option against a clear course need.
Use the splash window as a reference, not a magic mark
A visible practice window can focus attention on the strike area, but it must not become a claim that every successful bunker shot removes an identical amount of sand. Sand depth, firmness, club, speed and lie can change the splash. Use a broad reference and connect it to the actual carry pattern rather than chasing a perfect-looking divot.
If the player repeatedly looks down and tries to manufacture a mark, restore the external task. Call the landing zone first. The sand observation is supporting evidence, not the final objective. The ball must clear the lip, land safely and react in a useful way. A neat splash that produces the wrong carry is not automatically successful.
When the pattern is difficult to see, take one safe side-on recording from outside the strike and target corridors. Review the group after the set. Video can clarify whether the visible entry moved, but it still does not replace measured club or ball data. Keep the language observational and avoid frame-by-frame certainty from blurred sand.
Do not turn speed into a vague command
“Accelerate through it” can become an unhelpful instruction when it encourages a sudden hit. “Slow down” can create deceleration and poor commitment. Choose a cue that the player understands, such as completing the backswing, maintaining an organised rhythm or finishing the motion. The cue should support the called carry rather than prescribe one universal tempo.
If the player can reach zone one but forces zone three, test a longer motion before demanding more effort. If the motion becomes too long and unstable, try a different club or make the zone more realistic. Distance control should preserve a representative bunker action. A target that requires panic is not a fair calibration point.
Understand spin and landing angle without making them promises
TrackMan describes spin rate and landing information as measured parts of ball flight. Those numbers can help explain why two bunker shots with similar carry react differently, especially in a controlled lesson. They do not create a universal stopping formula. Surface, slope, ball condition, strike and the quality of measurement remain part of the result.
The official TrackMan bunker-shot case study of Bryson DeChambeau reports one high, spinning shot and its measured landing behaviour. It is an example of measurement around an elite shot, not a benchmark for ordinary golfers. Do not copy the numbers or assume that more spin always produces the desired outcome in every sand and green condition.
See TrackMan’s measured bunker-shot case study ↗
For this drill, use modest language: higher or lower flight, shorter or longer release, firmer or softer reaction. If measured spin and landing angle are available, compare matched groups rather than isolated highlights. The practical question remains whether the chosen shot can clear the lip, find the carry zone and produce a predictable enough release.
Progress from calibration to changing calls
Blocked practice is useful at the start. Hit several balls to the medium zone so the player can understand the lie and stock action. Then move through the three zones in a fixed order. Once the carries become recognisably different, stop repeating one target and require a fresh call before every ball.
Write a nine-shot order in advance or shuffle three zone cards. Keep the club, lie, bunker, markers and scoring unchanged. The player must look at the new zone, retrieve the intended input and commit. If the result drops when targets change, the practice has revealed a switching problem rather than a failure of the entire technique.
Use paired contrasts if random calls are too difficult: zone one then zone three, or zone two then zone one. The contrast helps the player identify what genuinely changes. Return to the random sequence after the pairs become clearer. The progression should increase the decision demand while protecting the original evidence fields.
Finish with a transfer set using three natural landing areas rather than the original coloured bands. Predict the carry and likely release before each shot. Remove or ignore the calibration markers if it is safe. The aim is to use the map in a new picture, not to become dependent on a permanent target grid.
Run a matched retest
Repeat the original club, lie, zone positions, order and scoring. If the bunker has been raked or the ball position moved, rebuild a comparable lie and note the change. Remove any temporary rehearsal that was not part of the baseline. A retest is useful only when the player faces substantially the same question.
Compare distributions. Count short, in-zone and long first landings for each called zone. Review the sand observations alongside them. Did one-sided misses move towards the target? Did the pattern tighten? Did a previously stable zone become two-sided? A better average finish with worse carry control is not automatically an improvement.
Record one conclusion and one next step. “The medium and long carries improved when the motion length changed, but the short zone began to run long” creates a useful next task. “My bunkers felt better” is too broad. The matched retest should narrow the next question rather than produce a collection of unrelated tips.
A 45-minute three-zone bunker session
Minutes 0–8: safety, lie and warm-up
Confirm the target area, rake policy and marker rules. Choose one representative flat lie, one club and three safe zones. Hit enough unscored balls to understand the lip and sand. Define the score categories and invalid-shot rule. Do not rehearse every target repeatedly before the baseline.
Minutes 8–20: nine-ball baseline
Hit zone one, two and three in order, repeated three times. Call each zone, complete the normal routine and record the sand observation, first landing, rollout and finish. Make no technical change inside the set. If an external interruption invalidates a ball, replace it once under the pre-agreed rule.
Minutes 20–31: one focused practice block
Read the earliest pattern and choose one input. Use six to nine discovery shots, mostly at the weakest zone. Keep the lie and score language stable. Review in small groups rather than after every ball. Stop if repeated hitting materially changes the sand or the player loses normal commitment.
Minutes 31–40: matched retest
Recreate the original sequence and score it exactly as before. Use the stock action, not an exaggerated rehearsal. Compare all nine balls. Keep the sand notes even if the final result looks good; they help distinguish improved calibration from a fortunate bounce or release.
Minutes 40–45: transfer and course care
Choose three natural landing areas with different release pictures. Call the carry and likely finish, then hit one ball to each without a rescue attempt. Write one transfer note. Collect markers and balls, rake the bunker as required and leave the area ready for the next player.
Adapt the test for measured indoor or simulator practice
Some launch-monitor environments can measure ball flight from supported bunker-style setups, but the exact facility and hitting surface determine what is possible. Do not create loose sand or an improvised hazard in a bay. Follow the facility’s approved setup and use carry as the primary measured outcome when a real sand strike is unavailable.
A mat-based rehearsal can still train the three carry calls, motion mapping and matched retest, but it does not prove performance from sand. Label it as carry calibration. The player should validate the map in a real practice bunker before treating it as a course-ready bunker system. Simulation and outdoor transfer answer related but different questions.
A measured Swing Suite lesson can help separate carry, launch, spin and landing behaviour where the technology and shot setup support those readings. The value is not in collecting every number. Select the parameters that answer the current pattern, then return to one practical carry decision.
See current Swing Suite TrackMan lesson information ↗
Adapt the drill when the bunker or green is small
If only one safe landing area exists, keep the zone and vary the intended carry within a broad band, or use two zones rather than forcing three. The structure is more important than the count: call the target, observe the sand, score the first landing and preserve rollout separately. Never create a longer target that brings another player, path or boundary into play.
You can also use one landing zone with two clubs. Keep the lie and target stable and compare how the club changes flight and release. This is a different experiment, so label it clearly. It can be valuable when the course offers one safe carry over the lip but several possible rollout requirements after landing.
If the bunker face hides every first bounce, move to a practice bunker with a better viewing angle or use a safely positioned observer. Do not climb the face or place a phone where it can be struck. A broad carry category recorded honestly is better than an exact-looking note based on guesswork.
Common three-zone bunker mistakes
- Choosing a zone so close to the lip that a normal miss returns to the bunker.
- Judging only the final finish and forgetting the first landing.
- Treating a visible splash mark as an exact measured low point.
- Changing club, lie, stance, ball position and speed after one poor shot.
- Comparing a clean lie with a buried or sloping lie without labelling it.
- Removing poor shots until the pattern looks tidy.
- Using tiny landing targets before a fair baseline exists.
- Reacting to every ball and creating a short-long correction cycle.
- Copying elite launch or spin numbers as a universal bunker target.
- Leaving the practice bunker or green in worse condition for the next player.
The correction is to protect the question. Use one safe lie, one called carry, one sand observation and separate rollout. Change one input only after the baseline. The bunker test should make the next decision clearer, not produce a bigger collection of swing thoughts.
Troubleshoot the drill
I cannot see where the ball first lands
Widen the zone, use an observer from a safe side position or move to a practice bunker with a lower lip. If suitable measured carry is available, use it. Do not score a hidden bounce as exact. Mark it unknown and preserve the sand observation and final result without pretending they reveal the missing landing point.
The ball clears the lip but always lands short
Confirm that the called zones are realistic and measured from the ball. If the sand pattern is stable, test one distance input: motion length, speed intention or club. Use the medium zone first. If the added carry damages strike and lip clearance, reduce the progression rather than forcing the longest target.
The ball lands in-zone but releases too far
Keep the successful carry score. Review the landing surface, slope, flight and club. Choose a shorter landing area, a different club or a separately labelled flight option, then test it. Do not rewrite a good first landing as a failure merely because the green released more than expected.
The long zone produces thin or bladed shots
Return to the medium zone and restore the representative stock action. The long target may be causing a forced hit or several setup changes. Try a longer organised motion or a different club, one at a time. If the shot still requires panic, move the zone closer and build the carry gradually.
The retest is worse than the baseline
Keep the result. The intervention may not have transferred, the baseline may have included a fortunate group or the sand may have changed. Check the matched conditions and fatigue. If the comparison was fair, revise or discard the intervention rather than altering the score or adding another fix immediately.
Questions golfers often ask
How wide should each bunker landing zone be?
Wide enough that normal observation error does not decide every score. Begin with a generous strip, create some honest in-zone outcomes and narrow only when the current band no longer separates the pattern. Record the boundaries so the matched retest uses the same test.
How many bunker shots should I hit?
Nine baseline balls can be a practical starting point, but it is not a scientific threshold. Use fewer when the bunker is busy, the sand changes quickly or the player tires. Use more only when every ball still includes a clear call, normal routine and proper course care.
Should I use one wedge or several?
Use one club when the question is how one stock bunker action produces three carries. Use several clubs when the question is how club choice changes flight and release for one carry area. Keep those experiments separate and label them. Clarity matters more than building a large shot menu in one session.
Should I aim at the flag?
Not during the first calibration. Aim at safe landing zones that create clear carry decisions. A flag can make every result feel like a success or failure based on the finish. Add the flag during transfer, after the player can predict where the ball should land and how it may release.
Does the closest ball win?
Not in the baseline carry test. The primary score is the first landing relative to the called zone, supported by the sand observation. The finish remains useful, but it cannot overwrite the earlier stages. A later performance game can award separate points for carry and finish.
Can I draw a strike line in the bunker?
Only in a permitted practice setting and under the facility’s rules. Do not use a practice line or deliberately test the sand during a round where the Rules restrict those actions. If markers are not allowed, use a broad visual reference and observational notes rather than modifying the bunker.
A simple bunker test to use this week
- Choose a designated practice bunker and confirm the safe target area.
- Use one representative lie, one club and one ball type.
- Mark three generous carry zones beyond the lip.
- Call the intended zone before every shot.
- Record a broad sand observation without claiming exact measurement.
- Record the first landing as short, in-zone or long.
- Keep rollout and finish in separate fields.
- Review the full sequence before changing one input.
- Repeat the original calls as a matched retest.
- Finish with three natural targets, then rake and clear the area.
Keep the first session plain. The three zones should answer one question: can the player produce three distinguishable safe carries from one representative bunker lie? The sand notes help explain how the shot was delivered. The rollout notes show how the green changed the complete result.
Reliable bunker distance control is not one spectacular recovery. It is a repeatable relationship between the lie, the stock action, the carry decision and the expected release. Call the zone, keep the observations separate and let the matched retest decide whether the change helped.
Turn the bunker pattern into one coaching priority
If the splash and carry patterns remain unclear, or if the longer zone changes the whole action, measured coaching can reduce the problem to one practical priority. The useful outcome may be a more stable stock shot, a simpler distance map or a better landing-area decision rather than a new technical checklist.
Current Swing Suite lesson options, venues and availability remain on the live booking page instead of being hard-coded here. Bring the scorecard or the three-zone pattern to a lesson so the measured session starts with a real question and finishes with a test you can repeat.