
A reliable low-flight recovery shot begins with the window, not with a heroic picture of the ball threading through trees. Define the available height and width, the first safe landing area and the costly boundaries. Then test launch, start direction, curve, carry and finish with more than one club and swing size. Choose the option that repeatedly owns the widest margin, even when that option is simply pitching back to safety.
The practical outcome is a small recovery menu rather than one improvised punch. You should know which club produces your lowest controllable launch, which smaller motion keeps contact stable, how far that version carries and how wide its start-and-curve pattern becomes. The shot earns course use only when the whole pattern fits inside a genuinely safe corridor.
All launch figures, yardages and shot patterns in this guide are illustrative unless they come from your own measured test. Trees, branches, slopes, turf, wind, lie quality and the space around other people change the decision. Never strike towards a gap that could endanger players, staff, roads, property or neighbouring holes, and never treat a low flight as proof that a route is responsible.
The direct answer: build and test a start window
Choose a broad target corridor on a range, simulator or approved practice ground. Mark a maximum launch height, left and right start boundaries and a playable finish area. Begin with a short or mid iron and a controlled motion. Hit a labelled baseline, recording launch or visible height, start direction, curve, strike, carry and finish. Repeat with one alternative club while preserving the same target and scoring method.
Compare complete groups rather than best shots. A useful option clears the near ground, launches beneath the practice ceiling, starts inside the corridor, curves predictably enough to stay within it and finishes in a place that would leave the next shot. If an option needs perfect contact or a last-second curve to survive, it does not own enough margin for a pressured recovery.
On the course, inspect the lie and route before choosing the shot. If the ball cannot be contacted safely, the opening is too narrow, the landing area is hidden or the miss reaches serious trouble, take the simple route. Rule 19 allows a player to take unplayable-ball relief anywhere on the course except a penalty area, subject to the Rule’s procedures and penalty. The official Rule should be checked for the exact situation.
Why “keep it under the branches” is incomplete
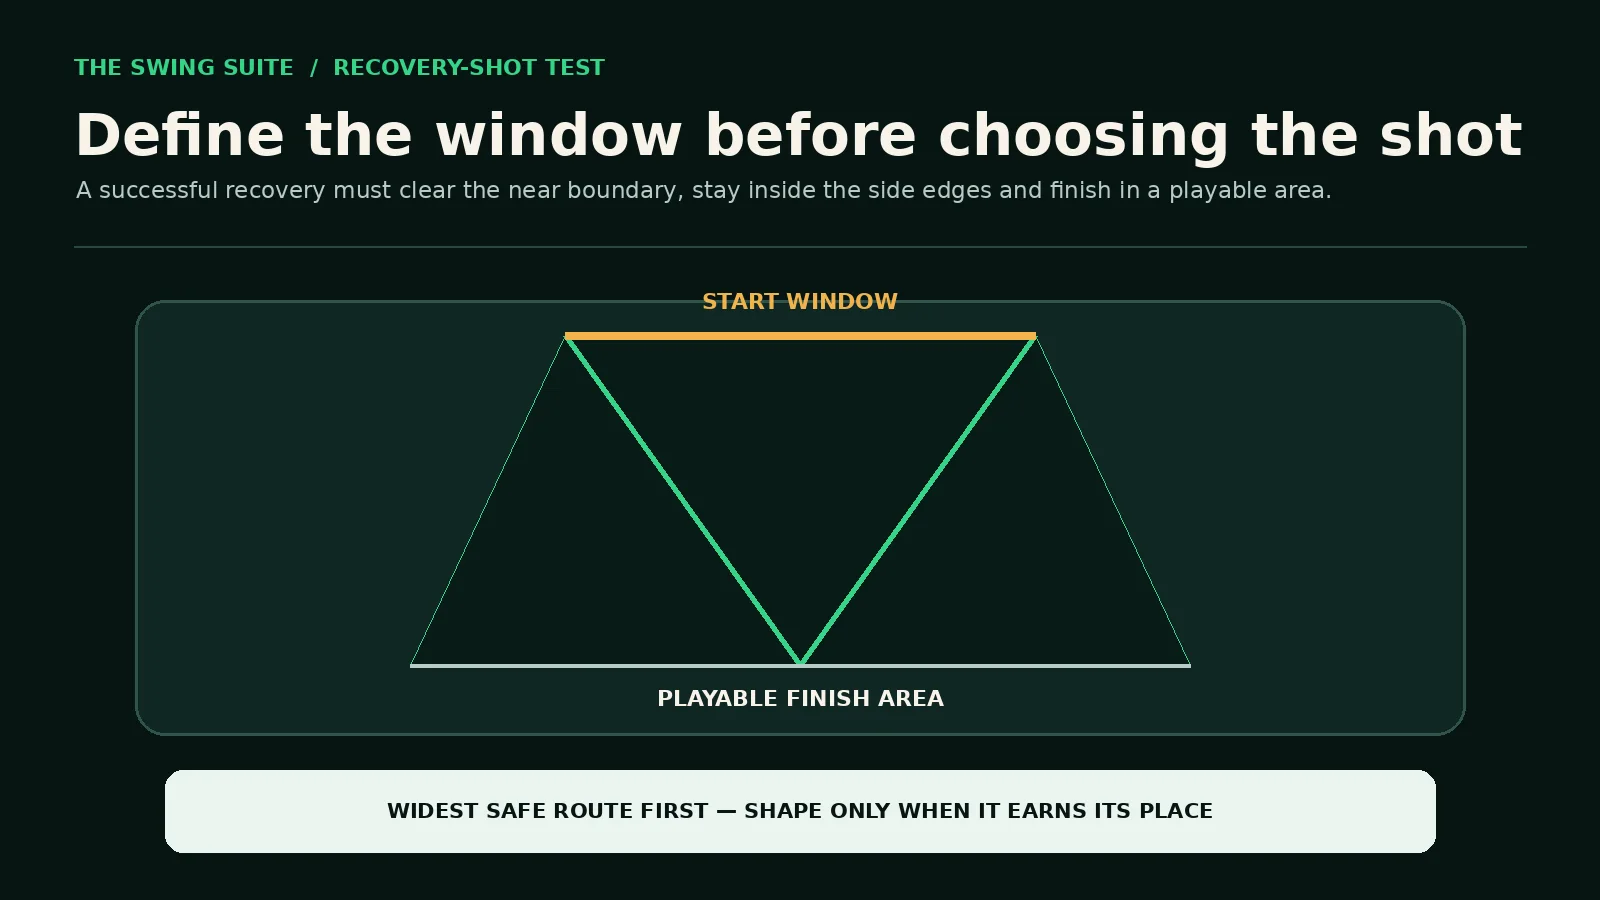
Height is only one boundary. A shot can remain low and still start into a trunk, curve through the side of the opening, land short in rough or run beyond the safe area. The task is three-dimensional: the ball must pass a near height-and-width window, travel an appropriate distance and finish in a useful zone. A low peak alone does not make the shot successful.
The phrase also hides contact risk. A player may move the ball back, lean the handle and swing sharply down in an attempt to flight it lower. From a poor lie, that combination can produce heavy, thin or excessively low contact. The apparent solution can therefore make the first metres of flight less predictable—the exact part of the shot that has the least room.
Treat low launch as one measured output, not the entire technique. Start with a motion you can deliver, observe the launch and then alter one variable. The goal is not to manufacture the smallest possible number. It is to find the lowest repeatable flight that still carries the immediate ground, preserves ball speed and fits the whole recovery corridor.
Define the recovery problem before selecting a club
Describe the lie first. Record grass depth, ball position in the grass, slope, moisture and whether the club can reach the back of the ball. A clean fairway lie and a ball sitting down beside a root are not versions of the same test. If a root, stone or fixed object creates danger, do not make a practice swing or stroke that risks injury or damage merely to preserve the original plan.
Describe the opening next. Estimate the lowest branch or practice ceiling, but also mark the side edges and the distance to the front of the playable landing zone. Then identify what happens beyond it. A recovery that runs through fairway into a bunker, water or thick rough may require a shorter carry or more loft than the opening alone appears to allow.
Finally, state the objective in plain language: return to the fairway, advance to a broad area, create a favourite next distance or reach the green only when the corridor and pattern genuinely support it. The objective determines how much risk is reasonable. A player who only needs to regain position should not judge success by maximum distance advanced.
Build a safe practice window
Do not practise by hitting through real trees. Create an artificial window with alignment rods, net markings, simulator graphics or distant visual references that do not place equipment in the ball’s path. The lower boundary represents ground or a near obstacle; the upper boundary represents the maximum useful launch. Side markers create the start corridor. A broad landing area completes the task.
Set the first window generously enough to collect information. If the target demands perfection from the opening ball, every miss becomes a failure and the test cannot reveal the true pattern. Begin with a window that your normal contact can enter, then narrow one boundary only after a repeatable option appears. The purpose is to measure capacity, not rehearse panic.
Keep observers behind the hitting line and confirm that every ball has a safe destination. Indoors, use the simulator target and screen rather than improvised physical obstacles. Outdoors, follow the facility’s instructions and stop when other users enter the potential line. Safety is part of the score: a shot that cannot be tested responsibly should not be selected on the course.
Measure launch height without chasing a magic number
TrackMan defines launch angle as the vertical angle of the ball’s centre of gravity immediately after separation from the clubface, relative to the ground plane. That gives a useful measured description of the initial flight. It does not provide one universal punch-shot target because the required height depends on the near window, speed, club, lie, curve, carry and player.
Review TrackMan’s launch-angle explanation ↗
When a launch monitor is unavailable, use a visual category tied to the practice station: below the top marker, through the middle, or above the window. Keep the observer in a safe position and avoid pretending that an estimated degree is precise. A consistent category is more useful than a false decimal because it supports comparison across clubs and swing sizes.
Record shots that launch too low as well as those that launch too high. A ball that meets the ground early, catches a bank or fails to carry rough has not solved the recovery. The useful launch band has a floor and a ceiling. Your test should reward the flight that passes between both while retaining enough speed and carry to reach the chosen finish area.
Separate launch direction from curve
The first metres of a recovery are often the least forgiving, so start direction deserves its own field. TrackMan defines launch direction as the horizontal angle of the ball immediately after separation from the clubface relative to the target line. In practical terms, it is the measured version of where the ball begins, before later curve changes its position.
Review TrackMan’s launch-direction explanation ↗
Record start as left edge, centre, right edge or outside the window. Then record curve separately. A ball can begin safely and curve out, or begin near an edge and curve towards the middle. Those are different patterns even if both finish in the same place. The safer option is the one whose early direction and later movement both have room.
Do not aim outside the opening because you expect the ball to curve back. The ball must own the initial corridor first. If the test shows a repeatable curve, place the start point where the complete pattern has margin; if curve varies, choose a wider opening or a straighter recovery. Hope that the ball will bend after a dangerous start is not a responsible strategy.
Use spin axis as context, not a promise
TrackMan describes spin axis as the tilt of the ball’s rotational axis relative to the horizon. That measurement helps describe expected curvature, but the visible result still depends on the complete launch conditions and environment. For recovery decisions, the key question is not whether a number looks technically interesting; it is whether the resulting curve remains inside the available width.
Review TrackMan’s spin-axis explanation ↗
Compare spin-axis or curve observations within matched options. If a small 7-iron repeatedly produces modest movement while a longer club creates a wider two-sided pattern, the shorter option may be stronger even when it advances less. If strike quality changes, keep that context beside the number rather than treating every reading as equally representative.
Avoid planning a pronounced hook or slice through a narrow opening unless that exact shot has a strong, current pattern and the consequences remain acceptable. Shaped recoveries can be useful, but they add another boundary. Begin with the straightest controllable option and require the shaped alternative to demonstrate a clear practical advantage before it enters the course menu.
Record strike before changing technique
Low-flight shots often encourage exaggerated setup changes. Before diagnosing the motion, record contact: centred, heel, toe, heavy, thin or uncertain. Add the lie and club. A flight that looks suitably low because the ball was struck thin is not a reliable recovery pattern. Its carry, start and height can change sharply when contact moves only slightly.
Keep ordinary misses in the baseline. Removing a heavy shot because it was “not the intended swing” produces an attractive but dishonest window. Exclude only a genuine interruption, measurement failure or clearly different task, and note the reason. The course decision must include the outcomes your current motion can actually produce under pressure.
Change one variable only after the baseline is visible. You might compare a smaller swing, a different club or a modest ball-position change, but do not alter all three together. One-variable comparisons make the result interpretable. If the group improves, you know which option earned a retest; if it worsens, you can return to the baseline without guessing.
Choose clubs by window ownership, not by loft alone
A lower-lofted club does not automatically produce the best low recovery. It may launch lower, but its longer shaft, faster ball speed and stronger run can widen start, carry and finish. A more lofted club with a smaller motion may clear the immediate ground, remain under the ceiling and finish sooner. Both must be tested against the same corridor.
Begin with two sensible candidates rather than the whole bag. For example, compare a controlled mid iron with a shorter-iron option that uses a smaller motion. Label each set. Preserve ball, target, surface and scoring. The purpose is to discover which option gives the most usable margin, not which club creates the single lowest or longest ball.
Add a hybrid or fairway wood only when the lie and required carry justify it and contact remains safe. Wide soles and different face constructions can change launch and turf interaction, but equipment theory does not replace the player’s result. If the longer option requires a clean lie that is absent on the course, its range pattern does not transfer to that decision.
Test swing size as a separate option
Use plain labels such as small, half and three-quarter rather than pretending swing length can be reproduced to an exact percentage. Start with the smallest motion that can carry the near boundary. Record the complete flight. If it falls short, increase the motion or change club; if it clears safely and finishes well, more speed is not automatically an improvement.
A shorter motion may narrow the pattern by reducing speed and movement, but it can also produce deceleration or poor contact for some players. That is why the option must be tested. Compare groups, not feelings. The smaller swing earns a place only when its strike, launch, start, carry and finish become usefully more predictable.
Keep tempo and commitment in the note. “Soft” is often too vague and may encourage guiding. A clearer cue is a defined finish or rehearsal length with a committed strike. The technical cue should remain secondary to the task: pass through the window and finish in the zone. If attention becomes crowded, simplify the motion rather than adding instructions.
Build a recovery scorecard
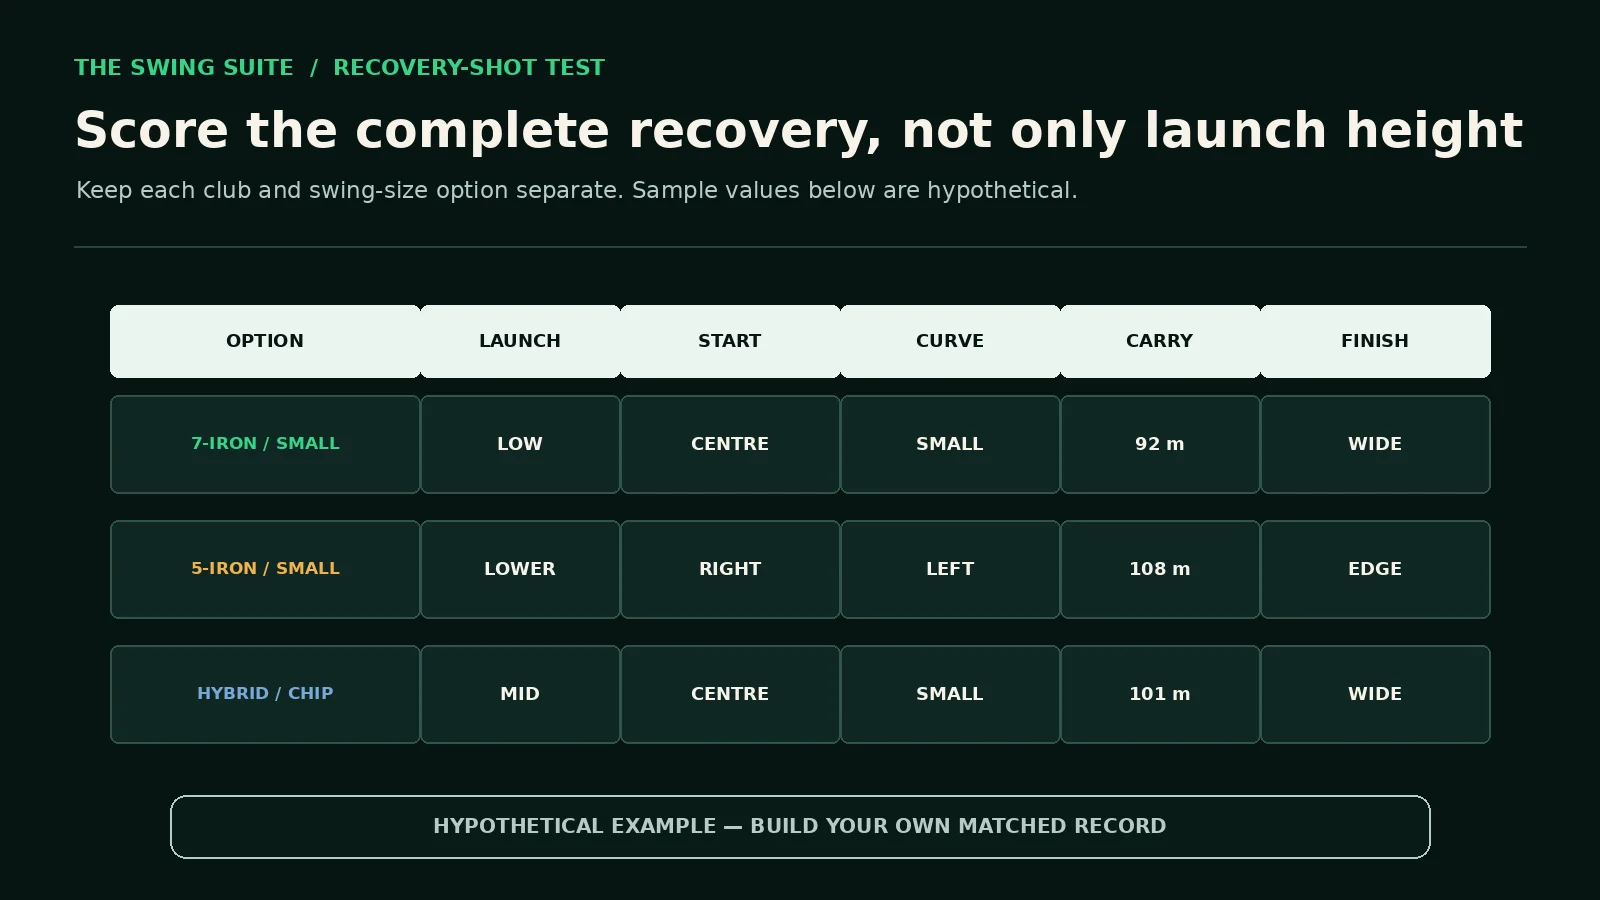
Give every valid ball six fields: option, launch band, start position, curve, carry and finish quality. Add strike as a seventh field when it changes. The scorecard should let you reconstruct the shot without relying on memory. A note that says “5-iron punch felt good” cannot show whether the ball began near the edge or whether one long runner distorted the impression.
Score the finish against the intended recovery objective. “Wide fairway”, “light rough”, “blocked again” and “serious trouble” are more useful than distance alone. A shot that advances farther but leaves another obstructed swing may be weaker than a shorter ball that returns to the centre. Recovery quality is measured by the next decision it creates.
The sample values in the accompanying diagram are hypothetical. Your numbers may differ materially and should be updated when surface, ball, club, technique or course conditions change. Preserve dated tests rather than editing old results into a neat permanent truth. A recovery option is a living pattern, not a promise that every future lie will behave the same way.
Use carry and run as separate depth questions
A low shot usually spends more of its journey near the ground and may release after landing, but the amount is not fixed. Turf firmness, slope, grass, moisture, ball speed, spin and landing angle all matter. Record carry to the first landing and total finish separately where possible. The route must contain both the airborne and running parts.
Protect the short side first when rough, a bank or another obstacle sits immediately ahead. Protect the long side when the fairway narrows, bends into trouble or runs downhill. If the observed carry-plus-run range overlaps both boundaries, the option does not fit even when its average finishes in the middle. Choose a different club, angle or simpler lateral recovery.
Indoors, treat simulated run as context rather than a perfect forecast for the course. Use launch, start, curve and carry to build the controllable part, then verify the finish behaviour outdoors in an approved area. Keep the surface label in the record so a mat-based pattern is not silently presented as proof of performance from wet rough.
Start with the widest responsible route
When several gaps appear possible, compare their effective width at the ball and through the early flight. Perspective can make a distant opening look generous while the near edge remains tight. Select the route that gives the start pattern room and leads to the broadest playable area. Distance advanced is a secondary criterion after safety and repeatability.
A lateral or backward recovery can be the strongest decision. It may remove the obstruction completely, create a preferred yardage and avoid compounding one mistake with another. The scorecard should therefore include “pitch out” as a real option, not as a failure state. Every ambitious route must beat that baseline by enough to justify its extra exposure.
Use a decision threshold before the round: if the lie is uncertain, the opening is narrower than the tested pattern or the finish cannot be seen and verified, take the simple recovery. A pre-agreed threshold prevents adrenaline from changing the standard. The course is not the place to discover whether an untested shaped punch can miss a trunk by inches.
Compare a straight recovery with a shaped recovery
Build the straight option first. Choose a centre start, modest curve tolerance and broad finish. Once that pattern is known, create a separate shaped task only if common course situations genuinely require it. Label the intended start side, curve direction and finish. Do not merge straight and shaped balls into one group because their success boundaries are different.
The shaped option should solve a specific geometry problem, not provide entertainment. It might start through the widest part of an opening and move towards a safe fairway. Score failures honestly, including shots that start too close to the obstacle or curve too late. If the shaped set is wider or more dependent on one strike, keep it as practice rather than course policy.
Retest the straight baseline after shape practice. A player can temporarily adapt their delivery and then believe the original option has disappeared. The matched retest shows whether the simple recovery remains available. Course decisions should prefer the option with the clearest current evidence, not the one that produced the most memorable single ball.
A 50-minute low-flight recovery session
Minutes 0–8: establish ordinary contact
Warm up towards a broad target with normal shots. Note strike and starting direction without trying to flight the ball down. The objective is to separate the recovery test from first-swing stiffness. Stop if pain, poor footing or the environment makes the later task unsafe.
Minutes 8–15: build the window and objective
Create a safe visual ceiling, left and right boundaries and a broad finish zone. State the task: return to fairway, advance to a lay-up area or create a preferred next distance. Confirm that no person or property can enter the ball path. Record surface and conditions.
Minutes 15–25: test option one
Use one club and one clearly labelled swing size. Hit a small attentive set. Record launch band, start, curve, strike, carry and finish after every ball. Keep the window fixed and preserve ordinary misses. End with one descriptive sentence, not a technical verdict.
Minutes 25–35: test option two
Change only the club or swing size. Keep target, ball and scoring stable. Complete the same number of useful attempts where practical. Do not adjust the window to flatter the new option. Compare the complete group with the first set, including the worst responsible outcome.
Minutes 35–43: test one refinement
Choose one change supported by the evidence: slightly smaller motion, different club, clearer start reference or simpler finish objective. Avoid stacking changes. The refinement succeeds only if the complete pattern gains margin, not because one ball flies attractively beneath the marker.
Minutes 43–48: matched retest
Repeat the original leading option. Use the same window and scoring. Compare launch consistency, start width, strike, carry and finish. A weaker retest matters; it shows that the apparent solution may depend on fresh attention and needs more work before course use.
Minutes 48–50: write the course rule
Write one sentence naming the lie, club, motion, carry range and finish objective. Add the refusal condition: too narrow, poor lie, hidden landing area or serious miss. Finish with the simple alternative. A useful rule tells you both when to play the shot and when not to play it.
Common patterns and the next test
The ball stays low but starts outside the window
Treat start direction as the priority. Return to a wider corridor and a simpler centre reference. Check strike and face delivery only after the pattern is recorded. Do not aim farther towards danger in the hope of later curve. If the start remains wide, use a shorter option or take the lateral recovery.
The launch is variable but start direction is stable
Compare strike and dynamic delivery between high and low balls. Test one smaller motion or one different club. Keep the centre start. The option may become useful if height narrows without sacrificing near carry; if low shots catch the ground, increase the floor rather than celebrating the smallest launch.
Carry is predictable but run is not
Move the finish objective towards a broader area and record the surface. Test a more lofted option or shorter carry when long release reaches trouble. On the course, treat uncertain run as a reason for more depth margin. Do not borrow a firm-range rollout estimate for wet or sloping turf.
One club produces a two-sided curve pattern
A two-sided pattern is difficult to fit through a narrow corridor. Test a simpler swing size or different club, and inspect contact. If the width remains, remove that option from narrow recovery use. More aim cannot make a two-sided pattern one-sided; it only moves one miss closer to an edge.
The shaped shot works only on the best strikes
Keep the success and failure rates visible. If ordinary contact sends the ball into the obstacle side, the option lacks robust margin. Return to the straight recovery or pitch out. A course strategy should survive representative contact, not require the best strike of the session.
Common mistakes in recovery-shot practice
- Testing through real trees instead of creating a safe artificial window.
- Scoring only height and ignoring start, curve, carry and finish.
- Moving the target after every miss and losing the baseline.
- Removing heavy or thin shots because they weaken the pattern.
- Comparing different clubs with different windows or landing areas.
- Changing ball position, handle, club and swing size at once.
- Treating simulated run as an exact outdoor prediction.
- Planning curve before the ball owns the initial opening.
- Choosing maximum advancement over the widest responsible route.
- Practising from roots, stones or unstable ground where injury is possible.
- Assuming one successful punch is a course-ready pattern.
- Forgetting the simple pitch-out or unplayable-ball option.
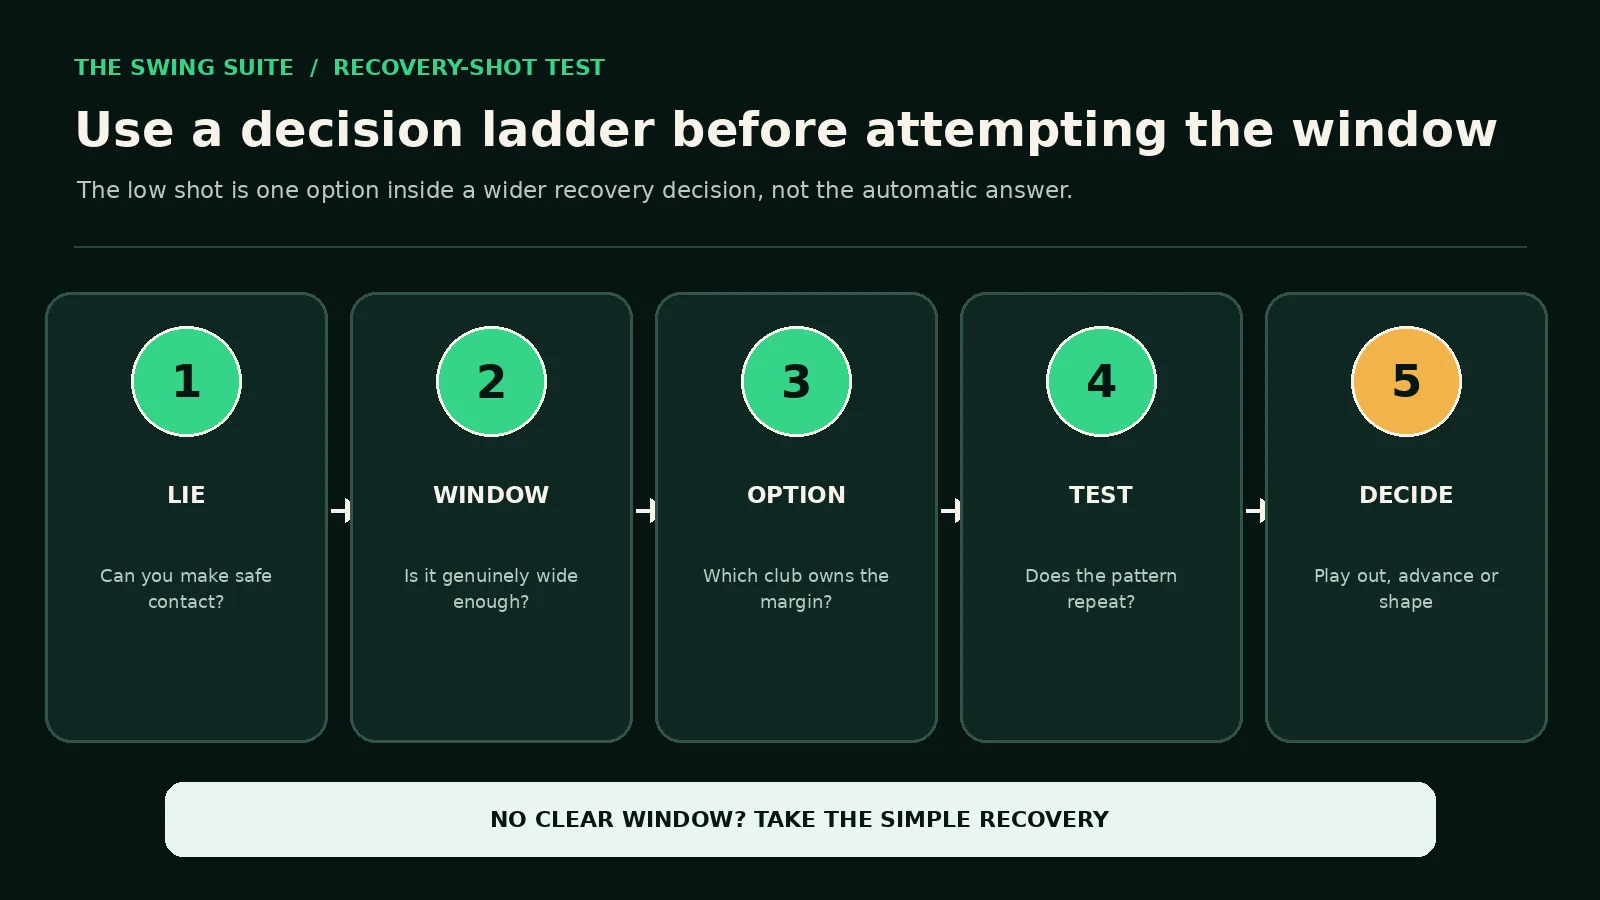
The correction is a clear sequence: inspect the lie, define the window, choose the objective, test one option, record the complete flight, compare one alternative and retest. That sequence converts a recovery from an improvised trick into a governed decision. It also makes it easier to stop when the shot does not fit.
Questions golfers often ask
Which club should I use for a punch shot?
Start with two sensible candidates and test them through the same window. The best option is the club that gives reliable contact, clears the near ground, stays below the ceiling, starts within the width and finishes safely. Lower loft or greater distance alone does not decide the answer.
How far back should the ball be?
Do not begin with a universal position. Record your normal controlled baseline, then test one modest change if launch remains too high. Extreme changes can damage contact or start direction. Keep the option only if the complete pattern improves and the motion remains safe from the relevant lie.
Should I keep my hands ahead?
Handle position affects delivery, but forcing it forward is not the goal. Use a simple motion that produces the required flight without losing strike or width. Measure the ball, not the pose. If a technical change is needed, test it under coaching rather than making an exaggerated course adjustment beside an obstacle.
How low is low enough?
Low enough means inside the defined window with room above and below. The useful ceiling depends on the obstacle; the useful floor depends on the ground and required carry. Do not chase a smaller launch once the ball safely owns both boundaries and the finish pattern is strong.
Can I hook or slice around a tree?
Only when the route is safe, the starting corridor is wide enough and that exact shaped pattern has been tested. The ball must not start through an obstacle or towards people or property. If the shape is variable or the landing area is uncertain, choose the straight or lateral recovery.
What if the ball is beside a root?
Do not risk injury or club damage. Consider whether the ball is unplayable and review the available relief procedures under Rule 19, unless another Rule applies. The correct option depends on the exact location and circumstances, so consult the official Rules rather than improvising a dangerous stroke.
How many balls prove the shot?
No small set proves it permanently. Use enough attentive attempts to reveal more than one outcome, preserve misses and repeat the matched task on another day. Consistent conditions and honest scoring matter more than a large mixed bucket. Mark the course note provisional until the pattern survives retesting.
A simple low-flight recovery checklist
- Confirm the lie can be played without risking injury or damage.
- Identify people, property and serious trouble before considering a route.
- Define the near height, side edges and playable finish area.
- Choose the widest responsible route and include pitch-out as an option.
- Label the club, swing size, surface and objective.
- Record launch, start, curve, strike, carry and finish.
- Keep ordinary misses and note genuine exclusions.
- Compare complete groups rather than the best ball.
- Retest the leading option through the original window.
- Use the shot only when the live lie and corridor match the evidence.
- Take relief or the simple recovery when any gate fails.
This checklist prevents “low” from becoming the only standard. It places the shot inside a larger decision that begins with safety and ends with the next playable position. The best recovery is not the one that looks most skilful. It is the one whose representative pattern fits the available space and leaves the round simpler.
Keep the course note concise. For example: “Clean fairway lie, controlled 7-iron, carries the near bank, launches through the middle of the practice window and finishes in the broad zone; if the opening is narrower than the tested start pattern, pitch sideways.” The wording identifies the condition, evidence and refusal point without inventing a guarantee.
Use Rule 19 when the responsible shot is not available
Under Rule 19, a player is the only person who may decide to treat their ball as unplayable. The Rule is generally available anywhere on the course except when the ball lies in a penalty area, and it provides relief options with a penalty stroke. Exact reference points, areas and procedures matter, so use the official Rule for the live situation.
Review Rule 19: Unplayable Ball ↗
Relief is not an admission of failure. It is part of course management. If a root, unstable stance, blocked strike or narrow corridor makes the stroke unreasonable, compare the likely result of relief with the likely result of the attempted escape. One penalty stroke can be cheaper than injury, damaged equipment or repeated trouble.
Do not move, bend or break growing objects to create a window unless the Rules specifically allow the action. This guide is a practice and decision framework, not a complete ruling for every obstruction or abnormal course condition. When another Rule may apply, identify it before lifting or moving the ball.
Turn the test into one coaching priority
A structured lesson can reduce the recovery task to one useful priority: contact, launch band, centre start, curve control or club selection. Bring the scorecard and describe the windows that appear most often on your course. That evidence helps recreate the decision without pretending a simulator or range station is identical to every outdoor lie.
TrackMan’s parameter library provides measured ball and club context, but the coaching objective remains practical: find a flight whose start, curve, carry and finish belong inside the safe route. Extra data should narrow the next test, not produce a technical speech while the player still lacks a dependable course option.
Review TrackMan’s measured parameter overview ↗
See the related guide to start direction and curve ↗
Review the option before every use
A tested recovery is not automatic permission to play it from every blocked position. Recheck the live lie, footing, branch height, side width, wind and finish area. Compare them with the conditions in your note. If one material boundary is tighter or the ball is sitting worse, reduce the ambition. The correct decision can change even when the club and apparent gap look familiar.
Use the pre-shot routine to confirm one start reference and one finish objective. Avoid adding a chain of mechanical reminders beside the obstacle. Rehearse the intended motion from a safe position, look once more at the full corridor and commit only when the picture remains responsible. If doubt grows during the routine, step away and choose the simple recovery rather than trying to rescue the ambitious plan with a last-second adjustment.
After the round, update the record with observations rather than a verdict based on score. Note whether the ball entered the window, where it landed and what next shot it created. A successful escape can still expose a weak pattern; an imperfect result can still confirm that the conservative route was correct. Course evidence should refine the menu without turning one outcome into a universal rule.
Current Swing Suite lesson options, venues and availability remain on the live booking page rather than being hard-coded here. The goal is a small, honest recovery menu: one straight low option, perhaps one tested shape, and a clear simple route when neither belongs in the space.